
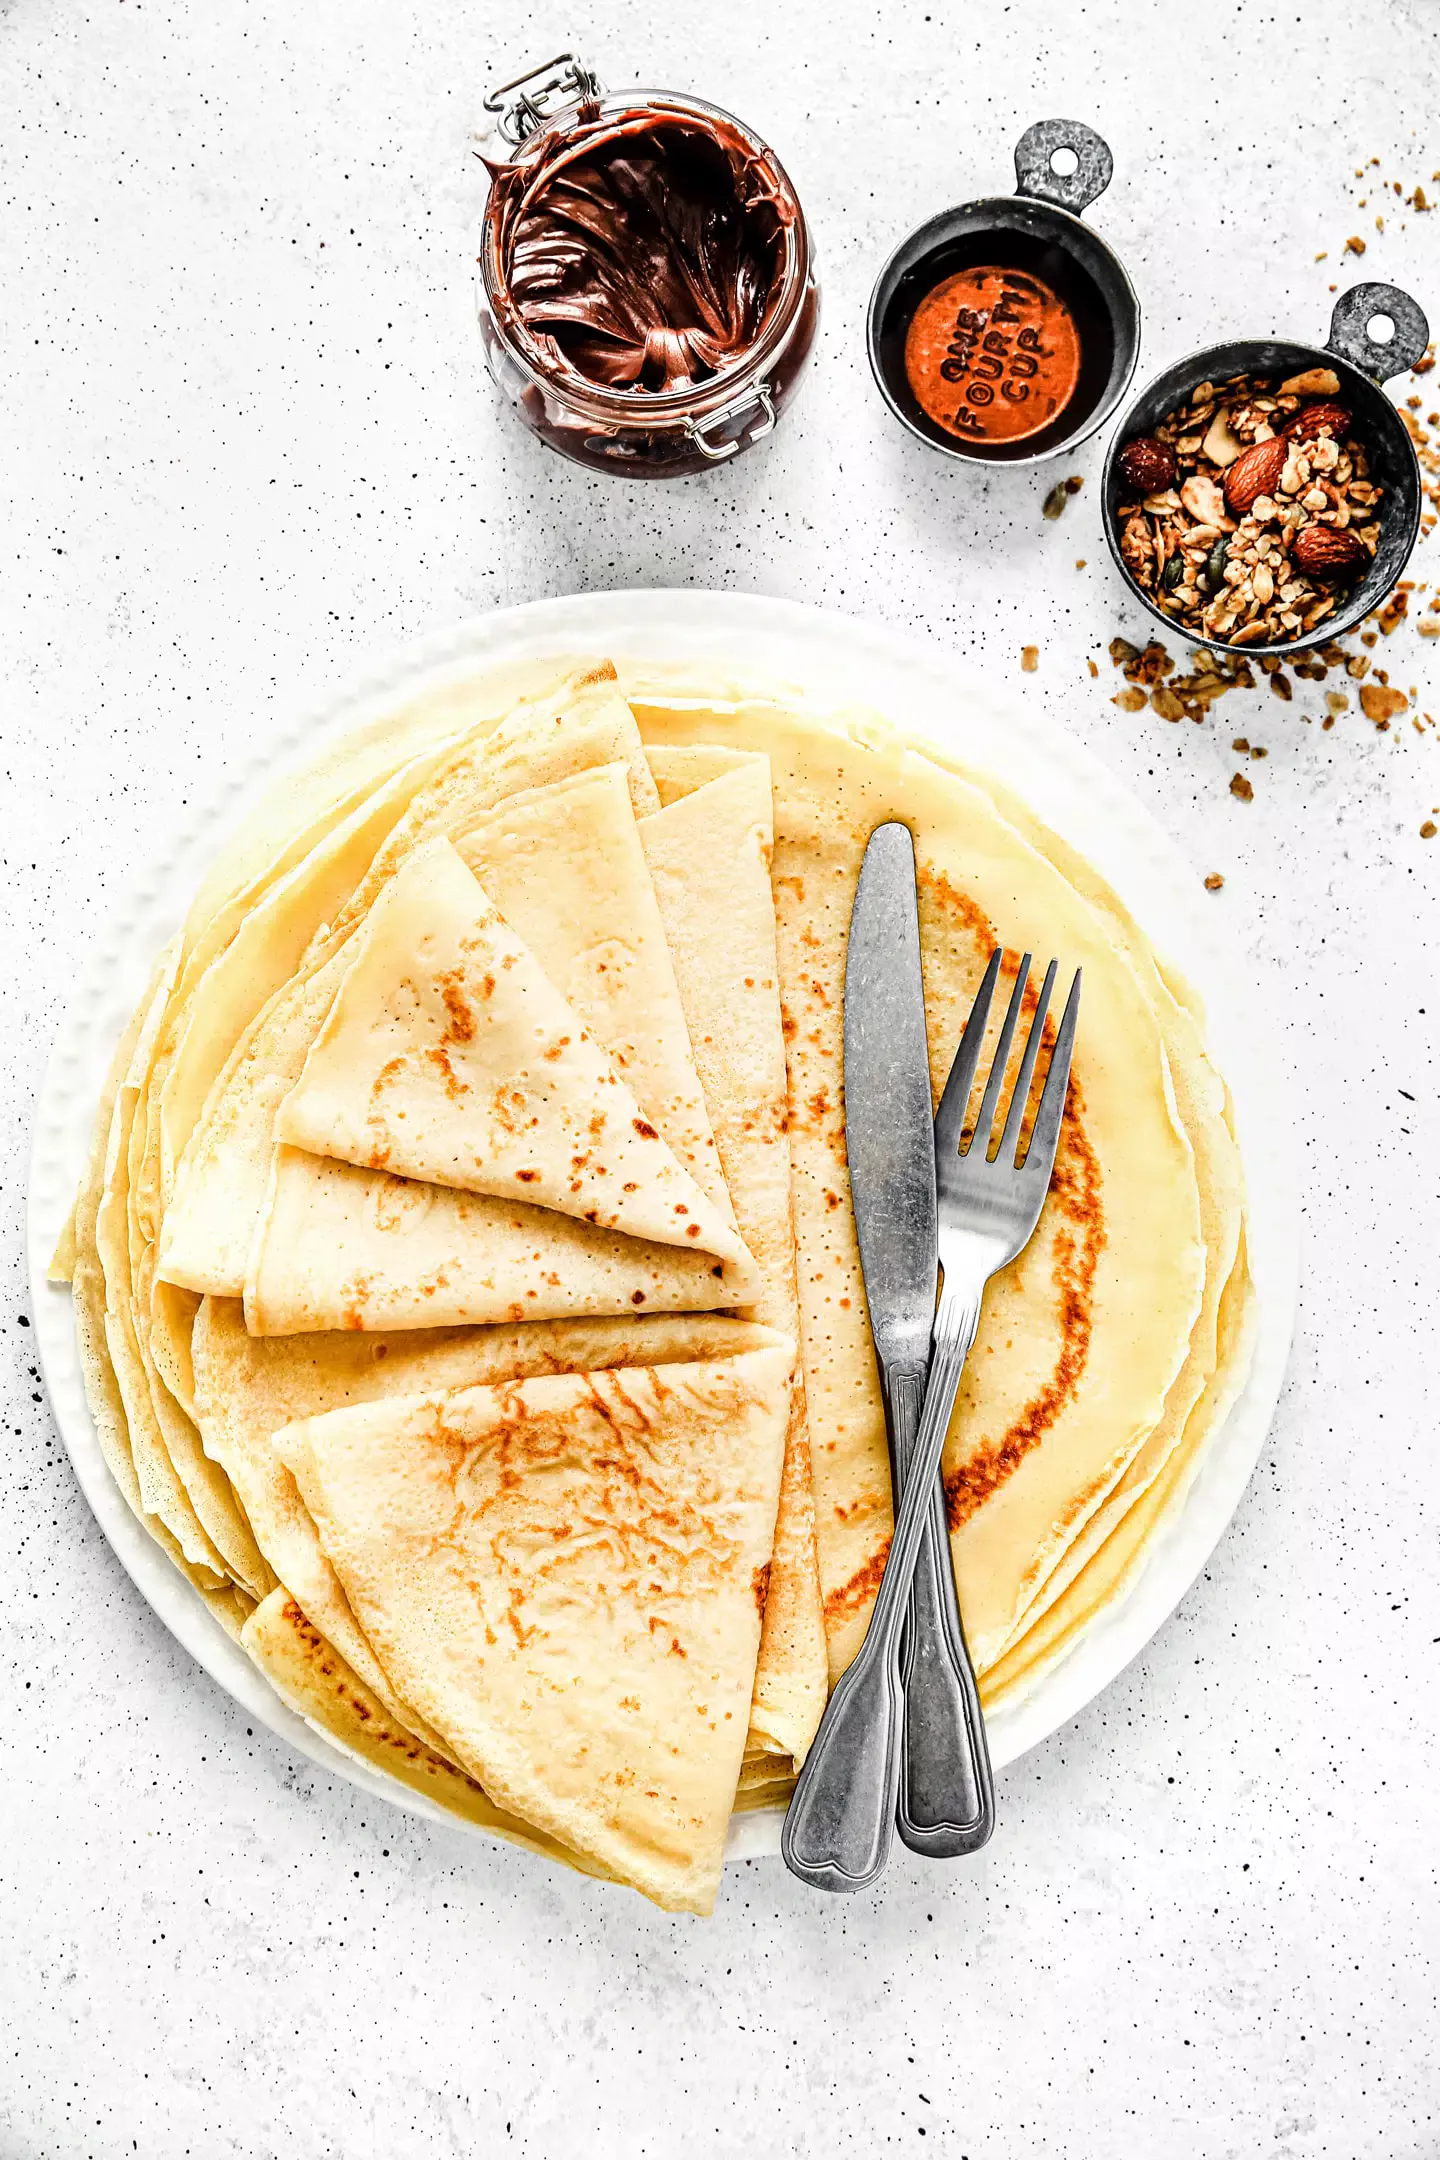
How To Make Gluten-free Crepes
Ingredient Gathering and Preparation
Ingredient gathering for gluten-free crepes requires careful attention to element, because the success of the recipe hinges on the standard and type of elements used.
Begin by selecting a high-quality gluten-free flour mix. Avoid blends containing fillers like potato starch in excessive portions, as these can result in gummy or dense crepes. Look for blends that list a selection of flours corresponding to rice flour, tapioca starch, potato starch (in moderation), and probably almond flour or cornstarch for a greater texture and flavour.
The ratio of those flours significantly impacts the final product. A blend with a better proportion of rice flour might lead to a barely drier crepe, while the next tapioca starch content contributes to a extra tender, slightly chewier texture. Experimentation may be necessary to discover your preferred blend.
Beyond the flour, you will need eggs. These provide construction and binding, essential for cohesive crepes. Fresh, high-quality eggs are recommended for the best outcome.
Milk is one other key ingredient; select a milk that complements your preferred taste profile. Dairy milk works well, offering richness, however options like almond milk, soy milk, or oat milk can be substituted, keeping in thoughts that the flavor may subtly change the final product.
A touch of melted butter provides richness and a nice aroma to the crepes. You also can use oil, however butter contributes a deeper flavor. Ensure the butter is fully melted before incorporating it into the batter to keep away from lumps.
A pinch of salt balances the sweetness and enhances the overall style of the crepes. Don’t be afraid to experiment with other delicate flavorings like a teaspoon of sugar for a barely sweeter crepe, or a dash of vanilla extract for added complexity.
Once you’ve got gathered all of the components, the preparation part begins. Measure all the dry elements – the gluten-free flour blend and salt – rigorously utilizing a kitchen scale for accuracy. This is crucial for constant results in gluten-free baking, as slight variations in flour measurements can significantly alter the texture.
In a large bowl, whisk the dry components collectively totally to make sure even distribution. This prevents pockets of flour from forming in the batter, leading to uneven cooking and textural inconsistencies.
In a separate bowl, whisk collectively the wet ingredients: eggs, milk, and melted butter. Whisk vigorously till nicely mixed and slightly frothy. This helps to aerate the batter, resulting in lighter, more delicate crepes.
Gently pour the moist ingredients into the dry elements, whisking continuously till simply mixed. Avoid overmixing, as this will develop gluten-like structures in gluten-free flours that lead to tough crepes. The batter should be smooth but not necessarily utterly lump-free.
Allow the batter to rest for no less than 15-30 minutes. This resting interval permits the gluten-free flour to totally hydrate, leading to a more cohesive and fewer crumbly crepe. During this time, the gluten-free starches will take in the liquid, leading to a better texture.
Before cooking, flippantly grease a non-stick crepe pan or a regular frying pan with somewhat butter or oil. This prevents sticking and ensures easy elimination of the cooked crepes.
Selecting the best gluten-free flour mix is paramount. Read labels fastidiously, on the lookout for blends specifically designed for crepe-making or these with a excessive proportion of tapioca starch and rice flour. Experimentation with totally different blends could be essential to search out your private desire for texture and taste.
Proper ingredient preparation and careful consideration to detail all through the process ensures the profitable creation of scrumptious and satisfying gluten-free crepes.
Before you begin making your gluten-free crepes, meticulous ingredient gathering and preparation is crucial for a profitable outcome.
Begin by fastidiously reading your chosen recipe completely. This ensures you might have all essential elements and perceive the steps involved earlier than starting.
Gather all your ingredients. This contains your gluten-free flour blend (typically a mix of rice flour, tapioca starch, potato starch, and probably others), eggs, milk (dairy or non-dairy), melted butter (or oil), and any additional flavorings like sugar or vanilla extract.
Check the expiration dates on all packaged elements. Using expired ingredients can negatively influence the taste and texture of your crepes.
For dry ingredients, like your gluten-free flour blend and sugar (if using), precisely measuring is paramount. Lumps in your flour can create inconsistencies in your batter.
Avoid scooping flour directly from the bag with a measuring cup. This often leads to packing the flour, leading to an inaccurate measurement. Instead, use a spoon to gently fluff the flour in its container earlier than spooning it into your measuring cup.
Level off the flour in your measuring cup utilizing a straight edge, similar to a butter knife or the flat aspect of a spatula. This ensures you might be using the right amount laid out in your recipe.
If your recipe requires a specific type of sugar, similar to granulated or powdered sugar, remember to use the correct type. Using the incorrect sugar can affect both the sweetness and the texture of your crepes.
For the wet ingredients, guarantee your eggs are at room temperature. Room temperature eggs incorporate more easily into the batter, making a smoother, extra consistent mixture.
Measure your milk accurately, using a liquid measuring cup. Place the cup on a flat floor to make sure an correct reading.
Melt your butter utterly before including it to the batter. This ensures even distribution and avoids unwanted lumps of cold butter.
Once all of your components are measured and prepared, you’ll have the ability to start combining them based on your recipe’s directions. Remember, light mixing is key to preventing lumps and ensuring a smooth batter.
Properly measuring your dry elements, notably your gluten-free flour blend, is crucial for attaining the desired texture in your gluten-free crepes. Take your time, use the right methods, and enjoy the means of crafting your delicious crepes!
Consider using a kitchen scale for even higher accuracy, particularly when working with gluten-free flour blends where the proportions of different starches are important. Weighing elements can decrease variations because of completely different brands or densities of flours.
Finally, before discarding any leftover ingredients, fastidiously retailer them according to their packaging directions to keep up freshness for future use.
Ingredient gathering for gluten-free crêpes begins with a cautious evaluation of your recipe. Note the specific flours required; blends usually work finest, combining the properties of various gluten-free flours like rice flour, almond flour, tapioca starch, and potato starch for optimum texture.
Check your pantry for these flours, guaranteeing they’re fresh and free from clumps. If essential, sift every flour individually to take away any lumps before measuring.
Next, gather the wet components: eggs, milk (dairy or non-dairy), melted butter or oil, and any additional flavorings like vanilla extract or lemon zest.
Always use contemporary, high-quality eggs for one of the best outcomes. Crack them gently right into a separate bowl to keep away from by accident including any shell fragments.
Measuring the milk is essential. Use a liquid measuring cup placed on a level surface for accuracy. Room temperature milk is generally most well-liked for better incorporation with different components.
If utilizing melted butter or oil, ensure it’s utterly melted and barely cooled to prevent cooking the eggs prematurely when combined. Avoid utilizing extraordinarily sizzling oil, as this could scramble the eggs.
For flavor enhancers, add them to the wet elements as per the recipe. Vanilla extract, a touch of sugar, or even a pinch of salt can elevate the crêpe’s taste.
Preparation of wet ingredients starts with whisking the eggs lightly in a medium-sized bowl until they are barely frothy. This incorporates air and creates a lighter batter.
Gradually whisk in the milk while constantly stirring to avoid lumps. This step is vital for a easy batter.
Once the milk is included, gently whisk within the melted butter or oil. The mixture ought to appear homogeneous.
Finally, slowly add the flavorings, guaranteeing they are fully combined into the moist components. A small quantity of sugar may be added right here for a slightly sweeter crêpe.
At this stage, the moist components are prepared and ready to be combined with the dry elements. It’s essential to keep away from overmixing as soon as the dry and wet elements are mixed to stop a tough crêpe.
Remember to scrub up any spills promptly to keep up a clean workspace.
Before you start combining wet and dry ingredients, ensure all measuring instruments are clean and dry to prevent the batter from changing into clumpy.
Consider using a scale to measure the components for more exact results, significantly with gluten-free flours as their weight can range.
Proper preparation of each moist and dry elements is key to attaining light, delicate, and flavorful gluten-free crêpes.
- Essential Wet Ingredients: Eggs, Milk (dairy or non-dairy), Melted Butter or Oil
- Optional Flavorings: Vanilla Extract, Lemon Zest, Sugar, Salt
- Preparation Steps:
- Crack eggs into a bowl and whisk flippantly.
- Gradually whisk in milk until clean.
- Gently incorporate melted butter/oil.
- Add flavorings and mix thoroughly.
Ingredient Gathering: Before you begin, ensure you’ve all essential gluten-free ingredients. This usually contains gluten-free flour blend (look for one particularly designed for crepes or pancakes, as some blends are higher fitted to bread), eggs, milk (dairy or non-dairy), melted butter (or oil), sugar (optional), and a pinch of salt.
Measuring Ingredients: Accuracy is vital for profitable crepes. Use measuring cups and spoons to precisely measure every ingredient. For the flour, spoon it into the measuring cup and level it off with a straight edge—don’t scoop directly from the bag, as this could result in inaccurate measurements.
Preparing the Gluten-Free Flour: Some gluten-free flour blends can be lumpy. To guarantee a easy batter, sift the flour earlier than measuring. This helps to take away any clumps and aerates the flour, leading to a lighter crepe. If your blend doesn’t include xanthan gum or guar gum, add half of to 3/4 teaspoon per cup of flour to help bind the batter.
Preparing the Eggs and Milk: Crack the eggs right into a separate bowl and frivolously whisk them with a fork until they’re slightly frothy. This incorporates air into the batter, contributing to a more tender crepe. For the milk, make certain it’s at room temperature if potential, this helps with even mixing.
Melting the Butter: Gently soften the butter in a small saucepan or microwave. Avoid browning the butter; you simply want it melted and slightly warm. Let it cool barely before including it to the batter.
Combining Wet and Dry Ingredients: This step requires a delicate touch to keep away from overmixing the batter. There are two common approaches:
Method 1 (Whisking): In a large bowl, whisk collectively the dry elements: gluten-free flour, sugar (if using), and salt. In a separate bowl, whisk collectively the wet components: eggs, milk, and melted butter. Gradually add the wet components to the dry components, whisking gently till just combined. Avoid overmixing, as this can lead to powerful crepes. A few small lumps are okay.
Method 2 (Blender): For a smoother batter, mix all wet and dry ingredients in a blender and mix until clean. Pulse the blender to avoid overmixing and creating too much air. This technique is particularly useful for ensuring a lump-free batter with gluten-free flour blends.
Resting the Batter: Once the batter is blended, let it rest for no less than 15-30 minutes. This allows the gluten-free flour to hydrate totally, leading to a more tender and less crumbly crepe. Cover the bowl with plastic wrap to stop a skin from forming on the floor.
Adjusting Consistency: If the batter is too thick, add a tablespoon or two of milk at a time until it reaches the desired consistency. If it’s too thin, add a spoonful of gluten-free flour until it thickens barely. The consistency should be much like heavy cream.
Preheating the Crepe Pan: Before cooking, warmth a lightly oiled non-stick crepe pan or skillet over medium warmth. A good high quality pan is essential for even cooking and straightforward flipping.
Batter Consistency and Resting
Achieving the proper gluten-free crepe relies heavily on understanding and mastering batter consistency. Unlike wheat-flour based mostly batters, gluten-free counterparts require a more delicate method to achieve that signature skinny, delicate texture.
The best consistency should resemble heavy cream or a very thick pancake batter. It should be pourable however not runny; it ought to coat the again of a spoon thickly, leaving a visual trail.
Too thin a batter will result in crepes which are fragile, susceptible to tearing, and lack physique. They may cook dinner inconsistently, leading to burnt patches or undercooked facilities.
Conversely, a batter that is too thick will produce crepes which are tough, rubbery, and tough to spread thinly within the pan. They could be overly dense and lack the characteristic delicate lightness of a great crepe.
The type of gluten-free flour mix significantly impacts the required liquid amount. Some blends take in more liquid than others. Always begin with the lower end of the liquid measurement specified in your recipe and gradually add more, mixing thoroughly after each addition, till the desired consistency is achieved.
Don’t be tempted to overmix the batter. Overmixing can develop the gluten-free flour’s starches, resulting in powerful, gummy crepes. Gentle mixing, just until the elements are included, is essential.
Resting the batter is essential for gluten-free crepes. This allows the starches to totally hydrate, leading to a smoother, extra cohesive batter. A resting period of at least 30 minutes, and up to several hours within the fridge, is recommended.
Resting helps to loosen up the batter, preventing it from being overly stringy or tough when cooked. The longer relaxation allows the starches to soak up the liquid totally, leading to a extra even cooking course of and a thinner, extra tender last product.
During the resting interval, the starch molecules swell and take in the liquid, making a more steady and uniform batter. This, in flip, leads to a extra even distribution of the batter within the pan, creating thinner, extra uniform crepes.
After resting, you might discover some separation in the batter. This is regular. Give the batter a delicate whisk earlier than cooking to redistribute the ingredients. Avoid vigorous mixing at this stage.
Experimentation is vital to mastering gluten-free crepe batter consistency. Keep notes on the specific flour mix you employ and the precise liquid measurements that yield the most effective outcomes on your preferred texture. Even delicate adjustments in humidity can affect the absorption fee of the flour.
The addition of binding brokers, similar to xanthan gum or psyllium husk, performs a significant function in attaining a cohesive batter. These components assist mimic the position of gluten in binding the components collectively, resulting in a extra steady and fewer likely to fall apart crepe.
Finally, the cooking course of itself impacts the final texture. Use a lightly oiled non-stick pan over medium-low warmth to keep away from burning the crepes. Cook them until frivolously golden brown on either side. Overcooking will result in dry and crisp crepes, whereas undercooking will depart them gummy.
By paying shut attention to batter consistency, resting time, and cooking method, you’ll find a way to master the artwork of making scrumptious, delicate, and perfectly textured gluten-free crepes.
Achieving the proper gluten-free crepe depends heavily on understanding batter consistency and the crucial function of resting.
Gluten-free flours, unlike their wheat-containing counterparts, lack the elastic gluten community that gives structure and holds liquids. This means gluten-free crepe batter tends to be extra delicate and requires cautious handling.
The perfect consistency ought to resemble heavy cream or a very thick pancake batter. It should coat the back of a spoon easily, but not be so thick that it is troublesome to pour.
Too skinny, and the crepes might be fragile and tear easily, resulting in uneven cooking and a less-than-appetising look.
Too thick, and the crepes will be dense, chewy, and presumably undercooked within the center.
Achieving the proper consistency often involves adjusting the liquid content. Start with the lower end of the liquid measurement in your recipe and gradually add extra until the specified consistency is reached.
This process requires patience and cautious remark.
Resting the batter just isn’t merely an optional step; it is completely important for profitable gluten-free crepes.
The resting period allows the gluten-free flour to totally hydrate. Many gluten-free flours, corresponding to almond flour or tapioca starch, take up liquid extra slowly than wheat flour.
During resting, the starches in the flour swell and soften, leading to a smoother, more cohesive batter.
This hydration course of is crucial for preventing the crepes from turning into dry, crumbly, or overly dense.
Resting also allows the flavors to meld and deepen, resulting in a extra complex and gratifying crepe.
The minimal resting time is usually 30 minutes, but longer rests of up to several hours, and even overnight in the refrigerator, can considerably improve the ultimate product.
Refrigeration helps slow down the hydration course of, preventing the batter from changing into too thin or watery.
When eradicating batter from refrigeration, let it come to room temperature before cooking to make sure even cooking and prevent temperature shock.
The importance of resting cannot be overstated. A correctly rested batter yields crepes which are tender, flavorful, and have a superior texture compared to these made with a freshly combined batter.
Remember that completely different gluten-free flour blends will require slightly different approaches. Experimentation is essential to discovering the optimum resting time and consistency on your chosen blend.
Here’s a summary of key factors regarding batter consistency and resting for gluten-free crepes:
- Consistency: Aim for a batter resembling heavy cream.
- Too thin: Fragile, simply torn crepes.
- Too thick: Dense, chewy, undercooked crepes.
- Resting: Essential for hydration, flavor development, and texture improvement.
- Minimum Resting Time: half-hour.
- Refrigeration: Helpful for longer rests.
- Room Temperature Before Cooking: Ensures even cooking.
By paying close attention to batter consistency and allowing enough resting time, you probably can confidently create delicious, delicate, and restaurant-quality gluten-free crepes.
Cooking the Crepes
Crafting the perfect gluten-free crepe begins with correctly heating your pan. This seemingly simple step is crucial for reaching that signature thin, delicate texture.
Forget blasting the heat to high; this is a recipe for disaster. High warmth will scorch your batter earlier than it even has a chance to set, resulting in burnt edges and a tough crepe.
Instead, aim for medium-low warmth. The best temperature should be persistently warm, not intensely sizzling. Think of it as a delicate simmer, not a roaring fire.
The finest method to gauge the temperature is to sprinkle a quantity of drops of water onto the surface of the pan. If the water sizzles gently and evaporates within a couple of seconds, your pan is prepared. If the water beads up or evaporates too rapidly, the pan is simply too hot. If it sits and doesn’t evaporate, it is too cold.
For non-stick pans, a lightweight coating of oil or butter is often adequate. Use a neutral-flavored oil like grapeseed or canola. For better flavor, think about clarified butter or a high-smoke-point oil.
Spread the oil or butter evenly across the pan’s floor using a paper towel or pastry brush. Avoid excessive quantities, as this could result in greasy crepes. A thin, even layer is key.
Once the oil is shimmering, you’re able to pour in your gluten-free batter. This is the place the follow comes in. Start with a small amount of batter for the first few crepes, to get a really feel for the way a lot you should cowl the pan evenly.
Tilt the pan gently to spread the batter thinly and evenly throughout the surface. The objective is to achieve a layer that is translucent enough to see the pan’s surface beneath however not so thin that it turns into fragile.
Cook the crepe for 1-2 minutes per facet, or till golden brown and lightly set. You ought to be capable of easily carry an edge with a spatula to examine for doneness. If the crepe is sticking, let it cook dinner a little longer.
As you turn out to be extra experienced, you may find you probably can adjust the warmth to cook your crepes quicker or slower, depending on your batter consistency and the sort of pan you’re using.
Remember, patience is key. Don’t rush the process. Taking your time will yield superbly cooked, thin, and flavorful gluten-free crepes every time.
Experiment with totally different gluten-free flour blends to seek out your choice. Some blends cook dinner faster or slower than others. Adjusting your cooking time and heat accordingly will ensure constant results.
With slightly follow and a spotlight to element, you may be a gluten-free crepe-making master in no time.
Always preserve a constant heat all through the cooking process. Avoid drastic adjustments in warmth settings throughout cooking.
Proper pan heating, along with a well-made batter, is the foundation of scrumptious gluten-free crepes. Enjoy the method, and savor the results!
Begin with a perfectly smooth gluten-free batter. Any lumps will translate to uneven crepes.
Heat a lightly oiled nonstick crepe pan or skillet over medium heat. The pan should be scorching sufficient that a drop of water sizzles instantly however not so sizzling that the batter burns.
For the pouring technique, maintain the ladle or measuring cup about 6 inches above the middle of the recent pan.
Pour a small amount of batter into the pan – roughly 1/4 cup to 1/3 cup, depending on the dimensions of your pan. This amount ought to create a crepe roughly 8-10 inches in diameter.
Immediately, using a swift, circular motion, tilt the pan to permit the batter to unfold thinly and evenly throughout the surface. You need a very thin layer.
If you are struggling to spread the batter, you must use the again of a spoon or a spatula to gently coax it into the desired form, however try to decrease disturbing the batter an extreme quantity of.
Avoid pouring an excessive quantity of batter without delay, as this can result in a thick, soggy crepe. Practice makes good in terms of getting the right amount.
Keep the heat consistent to make sure even cooking. Adjust as needed if the crepe is cooking too shortly or too slowly.
If the batter appears to clump or stick in certain areas, you may want to regulate the heat down slightly or use a little extra oil.
As the crepe cooks, you will notice the edges beginning to lift and slightly brown. This usually takes about 1-2 minutes per facet, relying on your warmth and the thickness of your batter.
Once the edges are set and the top floor is now not moist, it is time to flip.
Use a thin, flexible spatula to gently lift the edge of the crepe. If it releases easily, you possibly can carefully flip it over to cook dinner the other facet.
Cook the second side for an additional 30 seconds to 1 minute till lightly browned.
Once cooked, transfer the crepe to a plate and continue the method with the remaining batter. Stack the cooked crepes on top of each other to maintain them warm and pliable.
Important Note: For perfectly round crepes, use a non-stick pan with a barely raised edge to help contain the batter. It also helps guide the batter to unfold evenly with a little bit of practice.
For thinner crepes, use a barely smaller amount of batter per crepe.
The key to mastering the pouring and spreading of gluten-free crepe batter is follow and consistency in warmth and batter amount. Don’t be discouraged in case your first few crepes aren’t good – with a little endurance, you’ll turn into a crepe-making pro!
Mastering gluten-free crêpes requires a mild hand and careful attention to element, as the batter’s different composition necessitates adjustments to conventional techniques.
Begin by ensuring your gluten-free flour mix is finely ground; any lumps will create uneven cooking and texture.
Whisk the wet elements – eggs, milk (dairy or non-dairy), and melted butter – vigorously till totally combined and slightly frothy. This incorporates air, leading to lighter, more delicate crêpes.
Gradually add the dry ingredients, whisking continuously to prevent lumps from forming. A clean, pourable batter is the goal; avoid overmixing, which can result in robust crêpes.
Let the batter relaxation for a minimum of 15-30 minutes. This allows the gluten-free flour to hydrate totally, leading to a more cohesive and less crumbly crêpe.
Heat a lightly oiled non-stick pan over medium-low heat. This is crucial for gluten-free crêpes, as higher warmth can cause them to burn earlier than cooking by way of.
Use a small quantity of oil or butter for every crêpe; an extreme quantity of will make them greasy, whereas too little will lead to sticking.
Pour 1/4 cup to 1/3 cup of batter onto the recent pan, tilting it gently to unfold the batter evenly into a thin circle.
Cooking time is usually 1-2 minutes per side, however this could vary depending in your stovetop and the thickness of the crêpe. Watch carefully for tell-tale signs of doneness.
The edges will start to set and raise slightly from the pan. Tiny bubbles will seem on the floor, indicating that the crêpe is prepared to be flipped.
Flipping requires a delicate contact. Use a skinny, versatile spatula to gently loosen the perimeters of the crêpe before carefully flipping it over.
If the crêpe is sticking, wait a couple of more seconds before attempting to flip. A little further endurance is essential right here.
Cook the other aspect for an additional 1-2 minutes, until frivolously golden brown and cooked through.
Once cooked, stack the crêpes on a plate and canopy them with a clean kitchen towel to keep them heat and forestall them from drying out.
Experiment with totally different gluten-free flour blends to find one which yields the most effective outcomes for your taste and equipment.
Don’t be discouraged if your first try is not excellent; making gluten-free crêpes takes apply. With a little patience and a focus to element, you may soon be having fun with scrumptious, gentle, and flavorful crêpes.
Consider adding a touch of sugar or vanilla extract to the batter for additional flavor.
Serve your crêpes immediately together with your favorite fillings, each sweet and savory choices work fantastically.
Remember to adjust cooking time primarily based in your stove and the thickness of the batter; thinner crêpes will cook dinner quicker.
The ideal flipped crêpe will be evenly browned on either side, with no burnt or undercooked areas.
Properly rested batter is much less prone to produce crêpes which are too fragile or easily torn.
A well-seasoned non-stick pan will assist stop sticking and ensure even cooking.
Begin with the proper gluten-free flour blend. A mix particularly designed for crepes or pancakes will yield the most effective outcomes. Look for blends containing a mix of starches and flours like rice flour, tapioca starch, potato starch, and possibly a small quantity of almond flour or brown rice flour for added structure.
Measure your components precisely. Crepe batter is delicate; an extreme amount of or too little liquid will drastically have an result on the result. Use a kitchen scale for probably the most accurate measurements, particularly for the flour.
Whisk the batter thoroughly. Lumps within the batter can lead to uneven cooking and potentially sticking. Whisk vigorously until completely smooth and free of any clumps. Let the batter relaxation for a minimal of 15-30 minutes. This allows the gluten-free flour to hydrate totally, leading to a smoother, less sticky batter.
Use the correct pan and heat. A non-stick crepe pan or a well-seasoned cast iron skillet is good. Low to medium warmth is crucial. High heat will trigger the crepe to burn on the skin earlier than the within is cooked through, increasing the probability of sticking.
Lightly grease the pan earlier than every crepe. Use a neutral-flavored oil with a excessive smoke level like grapeseed oil or avocado oil. A pastry brush is ideal for making use of a thin, even coating. Avoid utilizing an extreme amount of oil, as this can make the crepes greasy.
Pour the batter in a circular motion. Use a small ladle or a measuring cup to pour a small amount of batter into the recent pan. Immediately tilt the pan to unfold the batter evenly into a skinny, round crepe. Don’t pour an excessive quantity of batter; goal for a skinny layer that cooks quickly.
Cook the crepe for roughly 1-2 minutes per side, or until golden brown and slightly set. Use a thin spatula to rigorously lift the perimeters and verify for doneness. If the crepe is sticking, it is doubtless not cooked enough. Reduce warmth and prepare dinner longer.
Don’t overcrowd the pan. Cooking several crepes without delay will decrease the pan temperature, growing cooking time and the chance of sticking. Cook one or two crepes at a time for optimum outcomes.
Keep cooked crepes warm. As you end each crepe, place it on a plate and cover it loosely with foil to forestall them from drying out. A low oven (around 200°F) can also be a great possibility for preserving them heat while you finish cooking the rest.
Experiment with add-ins. Once your crepe is cooked, you presumably can experiment with different fillings. Some options embody fruits, chocolate, nuts and even savory fillings similar to cheeses and greens.
Proper cleanup is crucial. While the pan continues to be heat, wipe it clear with a paper towel to remove any lingering batter. This prevents residue build-up, lowering the chance of sticking next time.
If sticking persists, think about these additional tips:
- Use a nonstick cooking spray specifically designed for top warmth.
- Ensure your pan is properly seasoned if using cast iron.
- Reduce the amount of wet ingredients barely in your batter if it seems too moist.
- Try including a small quantity of xanthan gum or one other gluten-free binder to the batter to enhance its structure.
[newline]
With apply and a spotlight to detail, you’ll be making scrumptious, non-sticking gluten-free crepes in no time!
Filling and Serving Suggestions
For gluten-free crepes, the fillings and serving ideas may be incredibly versatile, allowing for each candy and savory options. The delicate nature of gluten-free crepes means you need to keep away from overly heavy fillings that might make them soggy.
Here are some sweet filling ideas, categorized for simpler navigation:
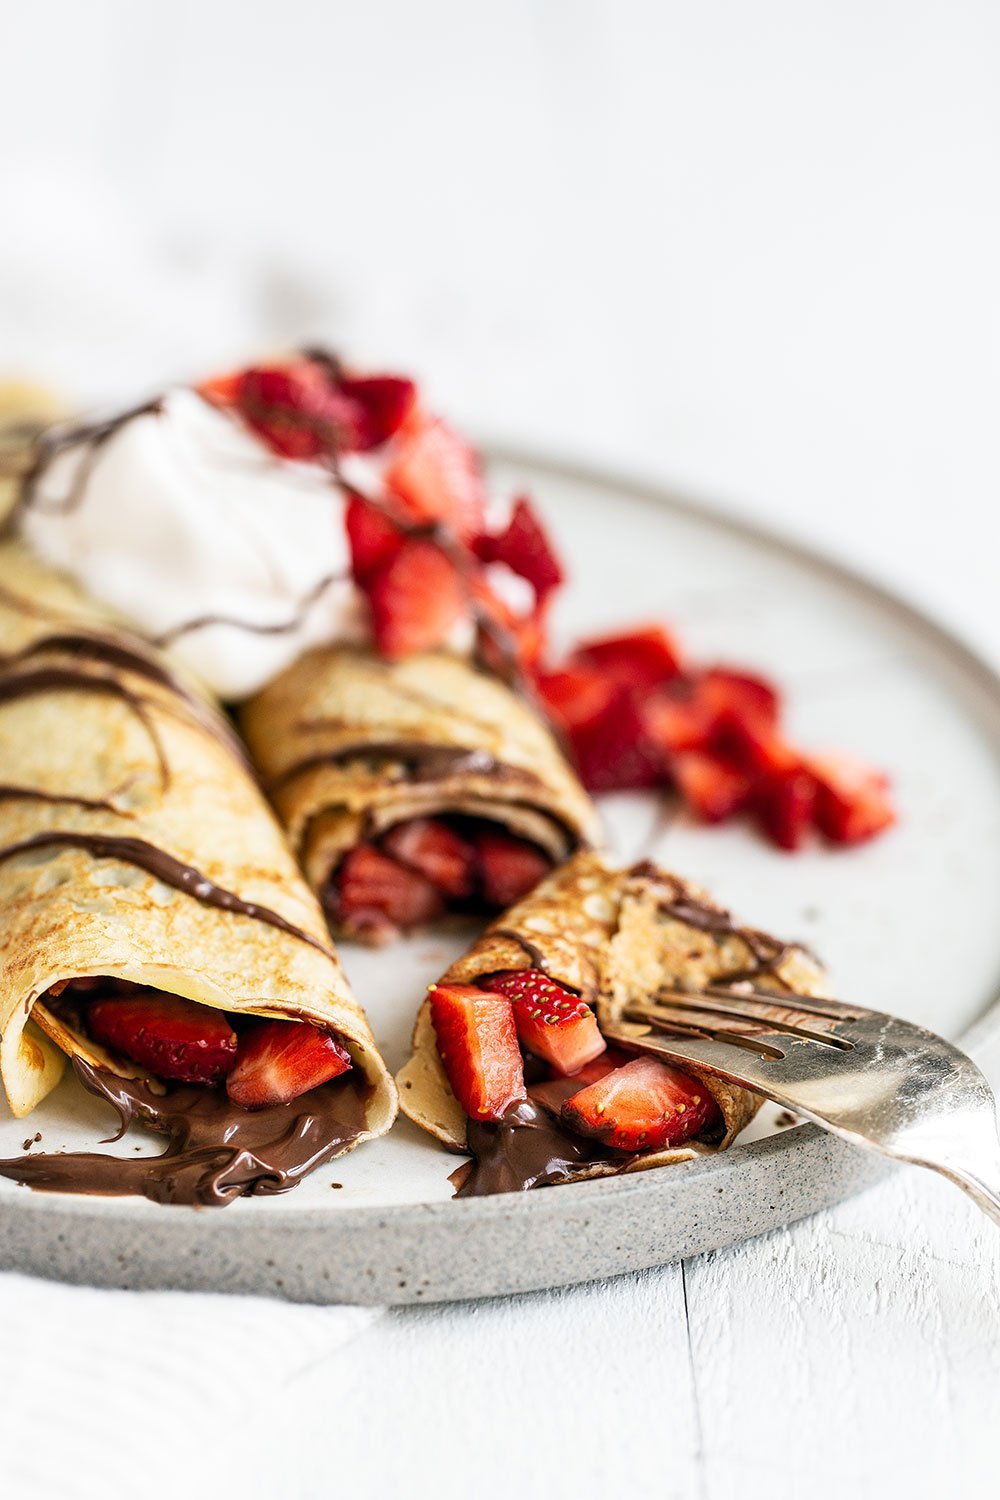
Classic Fruit Fillings: Fresh berries (strawberries, blueberries, raspberries) macerated with a touch of sugar and lemon juice are a light-weight and refreshing choice. Sliced bananas, peaches, or apples sautéed with a touch of cinnamon additionally work splendidly. Consider including a dollop of whipped cream or a scoop of vanilla ice cream for further indulgence.
Creamy Fillings: A easy pastry cream (crème pâtissière) made without gluten-containing thickeners is a decadent selection. You can taste it with vanilla, chocolate, or even lemon zest. Mascarpone cheese whipped with sugar and vanilla extract creates a light and ethereal filling. A simple sweetened whipped cream is always a classic.
Chocolate Delights: Nutella spread is a well-liked and straightforward option. A ganache made with high-quality darkish or milk chocolate and cream adds a sophisticated touch. Chocolate hazelnut spread combined with fresh raspberries creates a delightful distinction of flavors and textures.
Nut Butters and Spreads: Almond butter, peanut butter, or cashew butter supply a protein-packed and satisfying filling. You can add a touch of honey or maple syrup to boost the sweetness. Consider pairing nut butters with sliced bananas or berries for added texture and taste.
Curds and Custards: Lemon curd or a light vanilla custard are wonderful decisions, offering a tart or sweet complement to the crepe’s subtle flavor. These fillings are best served at room temperature or slightly chilled to avoid a runny consistency.
Compote Fillings: Apple compote, pear compote, or perhaps a berry compote add a rustic and comforting touch. These may be made ahead of time and stored within the fridge, making them a convenient choice.
Serving Suggestions:
Dusting with Powdered Sugar: A simple and chic method to finish your crepes, offering a light-weight sweetness.
Drizzling with Chocolate Sauce or Caramel Sauce: Adds a rich and decadent contact to any filling.
Adding a Garnish: Fresh mint leaves, a sprinkle of chopped nuts, or a couple of berries add visible appeal and enhance the flavors.
Serving with Ice Cream or Whipped Cream: Classic accompaniments that elevate the dessert experience.
Folding and Presentation: Crepes may be folded in varied methods – rolled, folded in half, or layered – to create visually appealing presentations. Consider using an ornamental plate or serving platter.
Temperature Considerations: Serve heat Crepes recipe with warm fillings and cold crepes with chilled fillings for optimum enjoyment. Consider reheating fillings if wanted.
Remember to experiment with completely different combinations of fillings and toppings to search out your favourite taste profiles. The great factor about gluten-free crepes lies of their versatility and flexibility.
For savory gluten-free crepes, the filling options are incredibly numerous and rely largely in your most well-liked flavors and dietary wants.
A classic choice is an easy cheese filling. Consider using a blend of Gruyère, Fontina, and Parmesan for a rich and complex flavor, or go for a milder mixture like mozzarella and ricotta. Adding a touch of contemporary herbs like chives or parsley elevates the style.
For a heartier filling, incorporate cooked meats. Shredded chicken or pulled pork, seasoned with your favorite spices, works wonderfully. Consider adding a creamy sauce like a béchamel or a light-weight French dressing to bind the ingredients.
Leftover roasted vegetables are a wonderful addition to a savory crepe filling. Roasted butternut squash with sage and caramelized onions, or roasted pink peppers and spinach with feta cheese create flavorful and visually appealing combinations. Adding a contact of balsamic glaze further enhances the flavors.
Seafood fillings provide a sophisticated twist. Flaked salmon with dill and lemon, or shrimp with a spicy Cajun seasoning, pair superbly with gluten-free crepes. A gentle cream sauce or aioli can complement the seafood’s delicate flavors.
Mushroom-based fillings are one other well-liked selection. Sautéed mushrooms with garlic, thyme, and a contact of cream create a wealthy and earthy filling. Consider including other greens like leeks or spinach to boost the texture and flavor.
For a vegetarian possibility, discover mixtures of beans, lentils, and greens. Black beans with corn and salsa, or lentils with roasted greens and herbs provide satisfying and nutritious fillings. A squeeze of lime juice brightens the flavors.
Spreads also can considerably improve the filling’s style and texture. Hummus, pesto, or a flavorful tapenade present a creamy base to which you can add different ingredients like roasted vegetables or crumbled cheese.
To elevate your crepe filling even additional, contemplate adding a final touch. A sprinkle of contemporary herbs, a drizzle of olive oil, a dollop of sour cream or crème fraîche, or a grating of hard cheese can all add a layer of flavor and visible appeal.
Serving recommendations depend on the filling’s nature. Simple fillings may be served instantly after preparation, while extra complex fillings could profit from a brief warming in a pan or oven before being folded into the crepe.
Crepes could be served as a light lunch, a complicated appetizer, or even as half of a larger buffet. They may be folded into triangles, rolled up, or just introduced as a flat disc with the filling nestled within the center.
Garnishing the completed crepe adds a last contact of elegance. A sprig of fresh herbs, a sprinkle of edible flowers, or a drizzle of a flavorful sauce can elevate the presentation.
Remember to consider the visible attraction when arranging the filling. A well-presented crepe is nearly as important as a delicious one. Experiment with colour contrasts and textures to create an appetizing dish.
Ultimately, one of the best filling for your gluten-free crepes is proscribed solely by your imagination. Don’t be afraid to experiment with totally different mixtures of flavors and textures to create your own signature crepe.
For fillings, think past the traditional Nutella and whipped cream. Consider savory choices like goat cheese and caramelized onions, or a vibrant spinach and ricotta blend.
A simple but elegant filling could be thinly sliced smoked salmon with a dill crème fraîche.
For a vegetarian delight, try roasted greens like bell peppers, zucchini, and eggplant, tossed with pesto and a sprinkle of parmesan.
Fruit fillings offer a refreshing contrast. Macerated berries with a hint of balsamic glaze create a sophisticated style.
Consider using seasonal fruits like peaches and plums for a summery crepe. A touch of lemon zest brightens the flavour.
For a more substantial meal, shredded rooster or pulled pork with a BBQ sauce makes a satisfying filling.
Leftover cooked quinoa or rice may be combined with herbs and vegetables for a wholesome and flavorful filling.
Dessert crepes could be elevated beyond easy toppings. Try layering different flavored fillings, corresponding to a chocolate ganache and a raspberry compote.
Consider utilizing flavored butters, similar to brown butter or lemon butter, to reinforce the style of each candy and savory fillings.
Creative presentation is vital to creating your gluten-free crepes visually interesting. Instead of simply folding them in half, experiment with completely different folding strategies.
Try rolling the crepes tightly and chopping them into smaller pieces for a extra manageable and enticing serving.
Arrange the crepes artfully on a plate, creating a visually fascinating pattern or design.
Garnish your crepes generously. Fresh herbs, edible flowers, a dusting of powdered sugar, or a drizzle of sauce can add a touch of elegance.
Use contrasting colors in your fillings and garnishes to create a vibrant and interesting presentation.
For a extra sophisticated look, consider serving your crepes on particular person small plates or in elegant dessert bowls.
If you’re serving savory crepes, think about using a easy side salad or a small bowl of soup to enrich the principle course.
For dessert crepes, accompany them with a scoop of ice cream or a dollop of whipped cream for a classic pairing.
To elevate the visible enchantment further, contemplate plating the crepes on a slate or wooden board, adding a country but refined contact.
Consider utilizing small ramekins or shot glasses to serve individual parts of the filling or sauce individually, creating an interactive eating expertise.
The presentation ought to mirror the complexity and sophistication of the fillings used. A simple filling could benefit from a minimalist presentation, while a complex filling may require a more elaborate strategy.
Don’t underestimate the facility of a well-placed garnish. A sprinkle of chopped nuts, a drizzle of chocolate sauce, or a sprig of fresh mint can remodel the visual enchantment of your crepes.
Ultimately, the necessary thing to each filling and serving is to stability flavor and visible attraction, making a dining experience that is each satisfying and pleasant.
Troubleshooting and Tips
Troubleshooting and Tips for Gluten-Free Crêpes
Making gluten-free crêpes could be trickier than their gluten-filled counterparts, but with a little consideration to detail, you’ll have the ability to obtain delicious, delicate results.
1. The Batter is Too Thick:
Problem: Your batter is thick and clumpy, making it difficult to unfold thinly on the pan.
Solution: Gradually add extra liquid, a tablespoon at a time, whisking continuously until you achieve a consistency much like heavy cream. Don’t add too much liquid all of sudden, or the crêpes shall be too thin and fragile.
2. The Batter is Too Thin:
Problem: Your batter is simply too runny, resulting in crêpes which may be skinny and fragile, tearing simply.
Solution: Add extra gluten-free flour mix, a tablespoon at a time, whisking till the specified consistency is reached. Be cautious to not add an excessive quantity of flour, as this can make the crêpes powerful.
3. The Crêpes are Sticking to the Pan:
Problem: Your crêpes are sticking to the pan, making them tough to flip and doubtlessly tearing them.
Solution: Ensure your pan is correctly seasoned or non-stick. Use a small quantity of oil or butter, lightly coating the pan before every crêpe. Don’t overcrowd the pan; allow enough house between crêpes for even cooking.
Additional Tip: A non-stick pan is extremely recommended for gluten-free crêpes.
4. The Crêpes are Tough or Rubbery:
Problem: Your crêpes are robust and chewy, lacking the desired delicate texture.
Solution: This is usually as a outcome of overmixing the batter or utilizing too much gluten-free flour. Mix the batter till simply mixed; overmixing develops the gluten (even in gluten-free flours) and might result in a tricky texture. Also ensure your gluten-free flour blend is designed for crêpes or pancakes, as some blends are higher suited for baked items.
Additional Tip: Let the batter relaxation for at least half-hour (or even longer) after mixing. This permits the gluten-free flour to hydrate, resulting in a more tender crêpe.
5. The Crêpes are Burning:
Problem: Your crêpes are burning on the underside earlier than they’re cooked through.
Solution: Reduce the heat on your stovetop. Gluten-free crêpes prepare dinner slightly sooner than conventional crêpes, so a decrease heat is often needed. Ensure your pan is correctly heated – it must be sizzling however not smoking.
6. The Crêpes are Falling Apart:
Problem: Your crêpes are fragile and crumble easily.
Solution: This could probably be as a result of batter being too skinny, overcooked, or an absence of binding brokers in your gluten-free flour mix. Experiment with adding a small quantity of xanthan gum (following package instructions) to extend binding. Don’t overcook; remove them from the pan as soon as they are set and frivolously golden.
7. Ingredient Selection:
Tip: Use a high-quality gluten-free flour mix particularly formulated for crêpes or pancakes. Read evaluations and select a blend identified for its capacity to supply tender and flavorful results.
Tip: Fresh eggs are key for creating a great texture. Older eggs might lead to weaker crêpes.
Tip: Don’t be afraid to experiment with completely different liquids – milk alternatives like almond milk or coconut milk can impart distinctive flavors.
By listening to the following pointers and troubleshooting ideas, you may be properly in your way to making perfect gluten-free crêpes each time!
Mastering gluten-free crepes requires consideration to detail, however the rewards are delicious!
Troubleshooting Common Issues:
Tough Crepes: Overmixing the batter is a common offender. Gluten-free flours need much less mixing than wheat-based flours; overmixing develops the gluten substitutes, leading to toughness. Mix till just mixed.
Crumbling Crepes: This usually signifies inadequate binding brokers. Ensure you are using enough eggs and/or xanthan gum. Experiment with different gluten-free flour blends; some bind higher than others.
Sticky Crepes: Too a lot liquid is the doubtless trigger. Next time, reduce the liquid barely, or add a tablespoon of gluten-free flour at a time till the batter thickens to the right consistency.
Holes and Tears: This may result from a batter that’s too thin, using too much warmth, or not letting the crepe cook lengthy enough before flipping. Adjust the heat and batter consistency. Let the primary facet prepare dinner absolutely earlier than flipping.
Burning Crepes: Reduce the heat! High warmth cooks the crepe too rapidly on the surface earlier than the inside is cooked through. Use medium-low warmth for even cooking.
Tips for Perfect Gluten-Free Crepes:
Flour Blend Selection: Experiment! Different blends supply unique outcomes. A blend of rice flour, tapioca starch, and potato starch often works properly, but feel free to incorporate almond flour or different options for flavor and texture variation. A small amount of xanthan gum (usually 1-2 teaspoons per cup of flour blend) is crucial for binding.
Resting the Batter: Let the batter rest for no much less than half-hour, and even longer (up to a few hours in the refrigerator). This allows the gluten-free flours to fully hydrate, leading to a smoother, extra cohesive crepe.
Proper Pan Preparation: A non-stick pan is important. Lightly grease it with butter or oil before every crepe (a light coating of oil on a paper towel works well). Use medium-low heat—this prevents sticking and burning.
Consistent Cooking Temperature: Maintain a constant heat throughout the cooking course of. Adjust as needed to forestall burning or undercooking.
Efficient Spreading: Use a small amount of batter for each crepe (about 1/4 cup, relying on pan size), spreading it evenly and thinly in a round motion utilizing a spoon or a ladle.
Flipping Technique: Once the perimeters start to set and the top appears dry, gently loosen the perimeters with a thin spatula. Flip the crepe when it’s simply launched from the pan.
Don’t Overcrowd the Pan: Cook one crepe at a time, guaranteeing each has ample space. Overcrowding will decrease the pan temperature and result in uneven cooking.
Filling Ideas: Get inventive with your fillings! Sweet options include fresh berries, whipped cream, Nutella, and fruit compotes. Savory choices can include cheese, ham, spinach, mushrooms, and various herbs.
Storage: Leftover crepes can be saved within the refrigerator for up to three days. Reheat them gently in a pan or microwave earlier than serving.
Experimentation is Key: Don’t be afraid to tweak the recipe to your liking. Adjust the liquid, flour blend, and different components till you obtain your perfect gluten-free crepe.
By following these tips and troubleshooting methods, you will be nicely in your way to creating gentle, delicate, and delicious gluten-free crepes every time.
Troubleshooting Gluten-Free Crepes: The key to success lies in the right balance of elements and approach.
Problem: Crepes are too dry and crumbly.
Solution: Add more liquid, a tablespoon at a time, till the batter reaches the consistency of heavy cream. Consider adding an egg yolk for extra richness and binding.
Problem: Crepes are too sticky and gummy.
Solution: Your batter might be too moist. Let the batter relaxation for no much less than 30 minutes (or even up to an hour) to allow the gluten-free flour mix to fully hydrate. This will assist cut back stickiness. If the problem persists, add a little more gluten-free flour, a tablespoon at a time, until you obtain the specified consistency.
Problem: Crepes are tearing simply.
Solution: This typically happens with overly dry batters or if the pan isn’t sizzling sufficient. Ensure your pan is well-seasoned and heated appropriately earlier than including batter. Let the crepes cook undisturbed for a couple of moments before flipping to forestall tearing.
Problem: Crepes are tough or chewy.
Solution: Overmixing the batter can lead to powerful crepes. Mix gently till just combined to stop the event of gluten substitutes (which can create a tricky texture). Also, make certain you’re utilizing a good quality gluten-free flour blend formulated for crepes or pancakes; some blends perform higher than others.
Problem: Crepes are burning.
Solution: Reduce the heat. Ensure your pan is correctly preheated, but once the batter is in, reduce heat to medium-low to prevent burning. Use a non-stick pan and somewhat butter or oil to further stop sticking and burning.
Tips for Perfect Gluten-Free Crepes:
Use a great quality gluten-free flour blend: Not all blends are created equal. Look for blends particularly designed for baking or crepes, and think about blends that include xanthan gum or guar gum for better binding.
Don’t overmix the batter: Overmixing develops gluten substitutes and results in robust crepes. Mix only till just mixed.
Let the batter rest: Allowing the batter to rest permits the gluten-free flour to hydrate totally, resulting in a smoother and extra pliable crepe.
Use the proper pan: A well-seasoned, non-stick pan is good for gluten-free crepes. A good quality crepe pan with a skinny base additionally ensures even cooking.
Adjust the heat as wanted: Keep the heat at a medium-low setting after the initial preheating to stop burning.
Experiment with additions: Once you grasp the basic recipe, strive adding components like herbs, spices, or shredded cheese to customise your crepes.
Storage Suggestions:
For leftover crepes: Stack cooked crepes between sheets of parchment paper or wax paper, then wrap them tightly in plastic wrap or place them in an airtight container. Store them within the fridge for as much as three days.
Freezing crepes: You can also freeze cooked crepes for longer storage. Stack them between sheets of parchment paper, wrap tightly in plastic wrap, and then place them in a freezer bag. Frozen crepes can final for up to 3 months.
Reheating crepes: Reheat leftover crepes in a microwave, skillet, or toaster oven. A skillet works best for achieving a crispy texture. For microwaving, add a number of drops of water to stop them from drying out.
Making crepe batter ahead: Crepe batter may be made forward of time and saved within the refrigerator for as a lot as 2 days. Give it an excellent stir earlier than using.