

How To Make Chicken Paprikash With Homemade Paprika
Making Homemade Paprika
Creating really exceptional Chicken Paprikash hinges on the quality of your paprika, and do-it-yourself offers unparalleled depth of taste.
Begin by choosing the right peppers. Hungarian varieties, like Szegedi or Kalocsai, are good for their rich, sweet, and barely smoky notes, lending themselves beautifully to paprikash.
However, other candy peppers, like California wonders or even Anaheim peppers, can be substituted, although the ensuing paprika’s character will differ.
Avoid utilizing scorching peppers except you particularly desire a spicy paprika; the purpose is to develop a candy, nuanced flavor profile.
Once you have chosen your peppers, the preparation course of is essential.
Wash the peppers thoroughly underneath cool working water, removing any stems, seeds, and cores.
The seeds include capsaicin, the compound responsible for the warmth, so eradicating them ensures a candy paprika.
If you are aiming for a barely smoky flavor, consider roasting the peppers briefly over an open flame or under a broiler.
This charring enhances the depth of flavor, although it’s optionally available.
Alternatively, you presumably can bake the peppers in a preheated oven at 400°F (200°C) for about 20-30 minutes, till the skins start to blister and blacken slightly.
Once roasted (or not), permit the peppers to cool slightly, making them simpler to handle.
Next comes peeling. The charred skins will peel off more readily after cooling.
This step is essential for achieving a smoother, more refined paprika.
You can peel them by hand, or if you prefer, place the cooled peppers in a bowl covered with plastic wrap for 10-15 minutes; the steam will help the skins loosen.
After peeling, slice or roughly chop the peppers. The size does not considerably influence the ultimate product, however smaller pieces will dry sooner.
Spread the ready peppers in a single layer on a clear baking sheet or dehydrator trays.
For oven drying, the oven should be set to the lowest temperature attainable (ideally round 170°F/75°C), with the door slightly ajar for better air circulation.
Drying time is dependent upon the thickness of the pepper slices and your oven’s efficiency; this course of can take anywhere from 6-12 hours or even longer.
Regularly examine and rotate the peppers for even drying.
Alternatively, use a meals dehydrator, following the producer’s directions. Dehydrators provide more consistent and sooner outcomes.
The peppers are utterly dried when they’re brittle and crumble simply.
Once dried, grind the peppers utilizing a spice grinder or a high-powered blender till you attain your desired consistency—fine, medium, or coarse.
Store your homemade paprika in an hermetic container in a cool, darkish, and dry place to preserve its vibrant shade and flavor.
With your homemade paprika, you’re able to embark on making a really authentic and flavorful Chicken Paprikash. The superior quality of your do-it-yourself spice will elevate the dish to an entire new degree of deliciousness.
Remember that the flavour of your paprika will evolve and deepen over time.
Experiment with totally different pepper varieties to search out your good paprika mix.
Harvesting your peppers at their peak ripeness is essential for the most effective taste in your selfmade paprika. Look for plump, vibrant peppers, avoiding any that are bruised or damaged.
Wash the peppers thoroughly, removing any filth or debris. A light rinse is adequate; keep away from soaking, as extra moisture can hinder the drying process.
Several drying strategies exist. The easiest is air drying. Halve or quarter the peppers, depending on their measurement, and take away the seeds and membranes. Lay them in a single layer on a clear, dry floor, corresponding to a wire rack or baking sheet lined with parchment paper, ensuring good airflow.
Air drying takes the longest, probably lasting several weeks, depending on the humidity and temperature. Turn the peppers regularly to advertise even drying. They are ready when they are brittle and easily crumble.
Dehydrators provide a quicker drying method. Follow the manufacturer’s directions, but usually you’ll arrange the ready pepper halves or quarters in a single layer on the dehydrator trays. Drying time will differ, but usually takes 8-24 hours, depending on the dehydrator’s energy and the thickness of the pepper items.
Oven drying is an different choice, although it requires careful monitoring. Preheat your oven to the bottom setting, ideally between 170-190°F (77-88°C). Arrange the ready peppers in a single layer on a baking sheet lined with parchment paper. Leave the oven door slightly ajar to allow moisture to flee. Drying time will range but expect a quantity of hours, checking regularly to stop burning.
Once your peppers are utterly dry and brittle, it is time to grind them into paprika. Use a spice grinder, espresso grinder, or meals processor to achieve your desired texture. Start with a smaller amount and pulse till you attain your preferred consistency – from coarse to nice.
Sweet paprika is often produced from gentle peppers like bell peppers, whereas scorching paprika uses hotter varieties corresponding to cayenne or ancho chilies. You can modify the warmth stage by mixing totally different pepper varieties.
Store your selfmade paprika in hermetic containers in a cool, darkish, and dry place. Proper storage can keep your paprika fresh for a quantity of months, even up to a yr.
Now that you’ve your do-it-yourself paprika, you can create a scrumptious Chicken Paprikash. Begin by browning chicken items in a large pot or Dutch oven. Remove the chicken and put aside.
Sauté onions and garlic in the identical pot until softened. Add your homemade paprika, stirring constantly to stop burning. The paprika will bloom, releasing its full taste. This is a key step for a flavorful paprikash.
Add chicken broth or stock, together with tomatoes (fresh, canned, or tomato paste), and some other desired greens similar to carrots, potatoes, or bell peppers.
Return the chicken to the pot, season with salt and pepper to taste, convey to a simmer, cover, and cook till the chicken is tender and the sauce has thickened. This might take 1-2 hours, and even longer depending in your chicken items.
Before serving, taste and adjust seasoning as needed. A dollop of sour cream or crème fraîche adds richness and a delightful tang. Serve sizzling together with your favourite facet dishes, maybe dumplings or egg noodles.
Enjoy the reward of your exhausting work – a flavorful Chicken Paprikash made with your personal distinctive paprika!
To make actually exceptional Chicken Paprikash, beginning with do-it-yourself paprika is key. The vibrant taste and depth you achieve can’t be replicated with store-bought variations.
First, you will want a big amount of ripe, candy red peppers. The selection depends on your preference, however varieties like Hungarian wax peppers or California wonders are wonderful choices.
Wash the peppers completely, eradicating stems and any blemishes. Halve them lengthwise, and if desired, take away the seeds and membranes for a much less pungent paprika.
There are two main methods for drying: sun-drying and oven-drying.
Sun-Drying: This conventional method yields a richer flavor. Arrange the pepper halves in a single layer on a clean, dry floor, ideally a screen or mesh tray, in a well-ventilated, sunny location. Protect them from mud and insects with cheesecloth or netting. This process can take several days to every week, depending on the weather and humidity. The peppers are ready when they’re utterly dry and brittle.
Oven-Drying: This quicker technique is appropriate for less-than-ideal weather. Preheat your oven to the bottom setting, ideally around 170°F (77°C). Place the pepper halves on baking sheets lined with parchment paper, guaranteeing they are not overcrowded. Dry for several hours, checking regularly and flipping sometimes. The peppers are prepared when they’re fully dry and brittle, which can take 4-6 hours or longer relying in your oven.
Once the peppers are totally dried, you should remove the stems if you have not already. This is easiest when they’re brittle.
Now comes the grinding. You have several choices:
Mortar and Pestle: For small batches, a mortar and pestle supplies a traditional and fragrant methodology. Grind the dried peppers slowly and steadily until you attain your desired consistency.
Spice Grinder/Coffee Grinder: A devoted spice grinder is ideal, making certain a consistent and fine powder. If utilizing a espresso grinder, dedicate it solely to spices to avoid taste contamination. Grind in small batches to forestall overheating and ensure even grinding.
Food Processor/Blender: These are helpful for bigger batches, but pulse gently to avoid overheating and making a paste-like texture. Start with quick pulses and check the consistency regularly.
Once floor, sift the paprika through a fine-mesh sieve to remove any larger items or stems that may have been missed. This results in a smoother, more constant paprika.
Store your selfmade paprika in an hermetic container in a cool, dark, and dry place. It will retain its vibrant shade and flavor for a number of months.
Now, with your freshly ground paprika, you’ll have the ability to proceed to create a really exceptional Chicken Paprikash. The wealthy, advanced taste of your do-it-yourself paprika will elevate the dish to a new degree.
Remember, the intensity of the paprika’s flavor will depend upon the type of pepper used and how finely it is floor. Experiment with different pepper varieties to find your good blend.
Enjoy the method of making your paprika and the scrumptious results in your Chicken Paprikash!
Preparing the Chicken
Before embarking on your Chicken Paprikash journey, choosing and preparing the chicken is paramount. The greatest cut for this dish is bone-in, skin-on chicken thighs. They stay juicy and flavorful even during longer cooking occasions.
Avoid utilizing boneless, skinless chicken breasts; they tend to dry out within the slow simmering process that defines Paprikash. The bone provides flavor and the pores and skin renders out scrumptious fats that contributes to the richness of the sauce.
When choosing your chicken, search for pieces which would possibly be plump, agency to the contact, and have a pale pink color with none discoloration or unusual odors.
Once you’ve chosen your chicken thighs, the next step is cutting them. While many recipes name for merely leaving the thighs entire, you can obtain more even cooking and a more beautiful presentation by slicing them into smaller, roughly 1-inch items.
Begin by totally washing the chicken thighs beneath chilly working water. Pat them dry with paper towels to remove extra moisture; it will ensure a great sear if you brown the chicken.
To cut the chicken paprikash with sour cream into 1-inch pieces, use a pointy knife. A boning knife is good for navigating around the bone, however a chef’s knife can work well too. Place the thigh on a cutting board, skin-side up.
Using your knife, reduce along the bone to separate the thigh from the drumstick. Then, place the thigh flat and reduce throughout the grain into 1-inch items. Remember to take away any excess fats that you simply see along the edges, however do leave some skin on the items.
For the drumstick, you’ll have the ability to both depart it entire or cut it into similar-sized items, relying on the scale of the drumstick itself. It’s simpler to work with smaller items for even cooking, however larger pieces also can work nicely if they’re uniformly sized.
Once all of the chicken is minimize into uniformly sized items, place them in a bowl and set aside. You may wish to season them flippantly with salt and pepper at this stage, although the first seasoning will come later within the recipe with the paprika and other aromatics. Don’t over-season the chicken before browning – it’s best to season strategically and adjust in accordance with your desire all through the cooking course of.
Proper preparation of the chicken is crucial for a successful Chicken Paprikash. Taking the time to fastidiously choose and minimize your chicken will reward you with a dish that’s both scrumptious and visually appealing. The even cooking of smaller pieces permits for a more complete flavor infusion from the paprika and other elements.
Remember to all the time prioritize food security. Wash your hands, your chopping board, and your knives totally before and after dealing with raw chicken.
- Choose bone-in, skin-on chicken thighs.
- Wash the chicken thoroughly.
- Pat the chicken dry with paper towels.
- Cut the chicken thighs into roughly 1-inch pieces.
- Separate the thigh from the drumstick.
- Cut across the grain.
- Remove extra fat, however leave some pores and skin.
- Optionally minimize the drumstick into smaller items.
- Season flippantly with salt and pepper.
- Maintain meals safety standards.
First, you’ll want to choose out your chicken. Ideally, bone-in, skin-on chicken thighs are finest for this recipe; they stay juicy and flavorful during the lengthy braising course of.
Pat the chicken thighs dry with paper towels. This is essential for achieving a great sear. Excess moisture will stop browning.
Season generously with salt and freshly floor black pepper. Don’t be shy; the chicken wants enough seasoning to hold the paprika’s taste.
For the homemade paprika, you should already have a prepared spice mix. If not, this step is crucial and will take time depending on the tactic used (smoking, drying etc). Ensure the paprika is finely ground for even distribution of flavor.
You’ll need a heavy-bottomed pot or Dutch oven. This is important for even warmth distribution and stopping sticking.
Add a high-quality fats to the pot – about 2 tablespoons of rendered chicken fat, duck fats, or maybe a neutral oil like canola or vegetable oil with a high smoke level. Heat the fat over medium-high warmth till it shimmers.
Carefully place the chicken thighs skin-side down within the scorching fats, guaranteeing to not overcrowd the pan. Overcrowding will decrease the temperature and stop correct searing.
Sear the chicken for about 4-5 minutes per side, undisturbed, till a deep golden brown crust varieties. Resist the urge to maneuver them around before this point.
Once the skin is beautifully browned, fastidiously flip the chicken items and sear the other side for one more 3-4 minutes.
The chicken ought to be properly browned on either side, however not fully cooked via at this stage. This searing step develops taste and texture.
Remove the seared chicken thighs from the pot and set them apart on a plate. Leave the rendered fat in the pot – it’ll add flavor to the sauce.
At this level, you would possibly have to take away excess fats if essential. Too much could make the sauce greasy.
Proceed to the subsequent steps of the recipe, which might contain sautéing aromatics (onion, garlic, and so forth.) earlier than including the paprika and other elements to create the paprikash sauce.
Remember to adjust cooking occasions based on the thickness of your chicken thighs. Thicker pieces might require slightly longer searing occasions.
Proper searing is vital to a delicious Chicken Paprikash. It creates a flavorful crust and contributes to the general depth of flavor within the last dish.
For greatest results, use a meat thermometer to verify the interior temperature of the chicken earlier than adding it to the sauce. It must be seared, but not overcooked at this stage.
- Choose bone-in, skin-on chicken thighs
- Pat chicken dry with paper towels
- Season generously with salt and pepper
- Use a heavy-bottomed pot or Dutch oven
- Heat high-quality fats until shimmering
- Sear skin-side down for 4-5 minutes per side
- Resist transferring chicken till browned
- Remove chicken and set aside
- Adjust cooking time for thickness
Making the Paprikash Sauce
The journey to a truly exceptional Chicken Paprikash begins lengthy earlier than the chicken even enters the pot: with the paprika.
Homemade paprika, smoky and intensely flavorful, is the cornerstone of this dish. To achieve the best outcomes, begin with high-quality dried peppers, ideally a combine of sweet and scorching varieties for complexity.
These peppers should be roasted till their skins blister and char, releasing their potent aromas and deepening their taste profile. This may be done in the oven, over an open flame, or even on a gasoline stovetop.
Once roasted, the peppers must be fastidiously cleaned of their stems and seeds. This process can be tedious, however taking your time will prevent unwanted bitterness.
The roasted peppers should then be meticulously floor, utilizing a spice grinder or even a mortar and pestle for the best texture. This course of should be done in batches to keep away from overloading the grinder.
The ensuing homemade paprika will be vibrant in colour and exponentially richer in taste than anything commercially out there, possessing a depth that elevates the paprikash to a complete new degree.
Now, on to the sauce itself. The basis of any good paprikash is a well-sautéed base of aromatics. This course of requires patience and a focus to detail.
Start by melting a generous quantity of lard or high-quality bacon fat in a big, heavy-bottomed pot or Dutch oven over medium heat. The fats should shimmer, not smoke.
Finely dice one giant onion and several cloves of garlic. The onions must be translucent and delicate, not browned, as browning at this stage can result in bitterness.
Add the onion to the new fat, stirring frequently to stop burning. Cook till the onion softens, roughly 5-7 minutes, aiming for a light-weight golden shade.
Add the minced garlic and cook for an additional minute or two, till aromatic, being careful not to burn the garlic, as it will impart a harsh style.
Next, the paprika makes its grand entrance. Stir in 2-3 tablespoons of your homemade paprika, guaranteeing it is totally integrated with the sautéed onions and garlic. Cook this combination for another minute, stirring continually, to bloom the paprika and unleash its full aromatic potential.
This cautious blooming course of is crucial, as it prevents the paprika from changing into bitter and instead permits its flavors to deepen and fully specific themselves.
For an even richer flavor, a tablespoon of candy paprika could be added together with the hot paprika to add sweetness and complexity to the base.
At this level, the bottom on your paprikash is full, its aromas filling your kitchen with the promise of a delicious and satisfying meal. The next steps involve the addition of chicken, broth, and other ingredients to create a cohesive and flavorful paprikash.
The course of is not rushed, but quite a careful orchestration of flavors, temperatures and timing, which results in a stunningly flavorful chicken paprikash.
- Roast peppers until blistered and charred.
- Remove stems and seeds fastidiously.
- Grind roasted peppers to make paprika.
- Melt lard or bacon fats in a pot.
- Sauté diced onion till softened.
- Add minced garlic and cook dinner till fragrant.
- Stir in selfmade paprika and prepare dinner for one minute.
- Bloom the paprika to unleash its taste.
Begin by rendering the fat from a beneficiant quantity of excellent quality bacon or lard in a heavy-bottomed pot or Dutch oven over medium warmth. This fat will type the foundation of your flavor, contributing richness and depth that oil merely cannot match.
Once the fat is rendered and the bacon is crisp (if using), take away the bacon and set it aside, reserving the rendered fat within the pot. Chop the bacon into small items and set aside to be added later.
Finely cube one large yellow onion and two carrots, and add them to the pot with the bacon fat. Cook them gently, stirring occasionally, until softened and translucent – about 8-10 minutes. Don’t rush this course of; low and sluggish is vital for growing taste.
Add 2-3 cloves of minced garlic to the pot and cook for another minute, till fragrant. Be cautious to not burn the garlic; it should solely lightly brown.
Now, the star of the present: your homemade paprika. Add 2-3 tablespoons (or more, to taste) of your homemade paprika to the pot. Toast the paprika gently within the fats for a few minute, stirring constantly, to release its advanced aromas and deepen its taste. This step is crucial for unlocking the paprika’s full potential.
Next, add 1-2 tablespoons of sweet Hungarian paprika (if you’ve some on hand, this adds one other layer of sweetness and depth) and stir properly to combine. This adds another layer of complexity to the paprika flavor.
Pour in 1-2 cups of good quality chicken broth (or vegetable broth for a vegetarian version), scraping the bottom of the pot to loosen any browned bits stuck to it. These browned bits, often identified as fond, are filled with flavor.
Add a beneficiant pinch of salt and freshly floor black pepper. A bay leaf adds refined depth as well.
Bring the mixture to a simmer, then reduce the heat to low, cowl, and let it simmer gently for no much less than 30 minutes, and even longer (up to an hour), permitting the flavors to meld and deepen. The longer it simmers, the richer and more complicated the flavour will turn into.
Taste the sauce and adjust the seasoning as wanted. You might wish to add more paprika, salt, pepper, or a contact of sugar to balance the acidity. Some cooks add a splash of tomato paste or a spoonful of tomato puree, to provide the sauce a richer color and a slightly tangier taste.
Once you are happy with the flavour, stir in the reserved crispy bacon and, if desired, a tablespoon or two of bitter cream or crème fraîche to add richness and a touch of tang. Stir gently to combine, being cautious not to curdle the cream. (If including the cream at the finish, avoid boiling the sauce).
The paprikash sauce is now able to be combined together with your cooked chicken. The long, gradual simmering process has created a richly flavored sauce that’s the perfect complement to the chicken.
For a fair richer sauce, you presumably can pressure the sauce through a fine-mesh sieve before adding the chicken, eradicating any solids and leaving solely the sleek, flavorful liquid.
Serve the Chicken Paprikash scorching, ideally with dumplings, egg noodles, or spaetzle.
To begin your chicken paprikash journey, you may first need to make your individual paprika. This elevates the dish to an entire new level of taste.
Start with a selection of sweet and scorching peppers – the proportions rely in your desired degree of heat. Hungarian varieties are ideal, however readily available candy bell peppers and jalapeños supply a great substitute.
Wash and dry the peppers completely, then remove the stems and seeds. For a smoother paprika, think about peeling the peppers as properly. This is definitely achieved by scoring the peppers and blanching them briefly in boiling water.
Once peeled (optional), roughly chop the peppers into smaller items to facilitate even drying.
There are two major methods for drying peppers for paprika: air drying and oven drying. Air drying, while slower, tends to yield a richer flavor. This includes stringing the pepper pieces and hanging them in a well-ventilated, heat, and dry area for several weeks, or till utterly dehydrated and brittle.
Oven drying presents a faster solution. Spread the pepper pieces in a single layer on baking sheets. Dry them in a low oven (around 170°F or 77°C) with the door slightly ajar to allow moisture to escape. This process sometimes takes a quantity of hours, turning sometimes to ensure even drying.
Once utterly dry, the peppers turn into easily crumbled. Use a spice grinder or meals processor to reduce back the dried peppers into a fine powder – that is your selfmade paprika.
Now, onto the paprikash sauce itself! Begin by browning your chicken pieces in a large pot or Dutch oven. Season generously with salt and pepper.
Once browned, take away the chicken from the pot and put aside. Add diced onions to the pot and sauté till softened. This varieties the bottom of your flavorful sauce.
This is where your homemade paprika takes center stage. Add 2-3 tablespoons (or extra to taste) of your freshly floor paprika to the pot with the onions. Stir well to coat the onions and release the extreme aroma and taste.
At this level, you’ll wish to add a spoonful of candy paprika for a richer shade and flavor when you like. You can also experiment with smoked paprika for a deeper, smoky observe.
Next, add your alternative of aromatics – garlic, caraway seeds, marjoram are traditional choices. Sauté briefly till fragrant.
Pour in a beneficiant amount of chicken broth or inventory, making a flavorful base for the sauce. You also can add a splash of white wine or tomato paste for complexity.
Return the browned chicken items to the pot. Bring the combination to a mild simmer, then cut back the warmth to low, cover, and let it braise for at least an hour, or until the chicken is tender and falling aside. The longer it simmers, the more developed the flavors will turn out to be.
Once the chicken is tender, you probably can thicken the sauce by eradicating a variety of the liquid and whisking in a slurry of flour and water, or by including a dollop of bitter cream or crème fraîche. Stir till smooth and creamy.
Finally, style and modify seasoning as wanted. A squeeze of lemon juice can brighten the flavors, and a sprinkle of contemporary parsley provides a lovely garnish.
Serve your selfmade chicken paprikash sizzling, accompanied by dumplings, noodles, or creamy polenta. Enjoy the fruits of your labor – a really delicious and rewarding experience.
Begin by rendering the fat from a beneficiant quantity of fine quality bacon or lard in a large, heavy-bottomed pot or Dutch oven over medium heat. The rendered fats will add incredible depth of flavor to the paprikash.
Once the fat is rendered, take away the bacon, reserving it for later use, and add finely diced onions to the pot. Sauté the onions till they are translucent and barely softened, about 5-7 minutes, stirring sometimes to prevent burning.
Next, add a beneficiant quantity of homemade paprika to the pot. The amount will depend on your choice and the efficiency of your paprika, but start with no less than 2-3 tablespoons and adjust to taste. Stir the paprika continually for about 1-2 minutes, toasting it gently and allowing its complicated flavors to bloom. This step is essential for creating the attribute rich shade and taste of the paprikash.
Carefully pour in a couple of cups of chicken broth, whisking continuously to prevent lumps from forming. The amount of broth will depend upon the desired consistency of your sauce, so begin with less and add more as needed.
Add a couple of tablespoons of tomato paste, stirring nicely to include it into the sauce. Tomato paste adds a refined sweetness and depth that balances the paprika’s smokiness.
Now it’s time for the aromatics. Add a couple of crushed cloves of garlic, a bay leaf, and a few sprigs of contemporary thyme or marjoram. These herbs contribute delicate notes of complexity to the sauce.
Season the sauce generously with salt and freshly floor black pepper. Taste and regulate the seasoning as wanted. Remember that the flavors will deepen because the sauce simmers.
Bring the sauce to a mild simmer, then cut back the heat to low, cover the pot, and let it simmer gently for a minimal of half-hour, or as much as an hour. The longer it simmers, the richer and more flavorful the sauce will turn into. Stir often to stop sticking.
During the simmering course of, the sauce will thicken naturally because the liquids scale back. If you prefer a thicker sauce, you can remove the lid over the last 15-20 minutes of simmering, allowing extra liquid to evaporate. Alternatively, you’ll be able to whisk in a tablespoon or two of cornstarch slurry (a mixture of cornstarch and cold water) to thicken it additional.
Once the sauce has reached your required consistency and taste, style it once more and regulate the seasoning if needed. The flavors should be rich, advanced, barely candy, and deeply savory.
Before serving, remove the bay leaf and thyme sprigs. Stir in the reserved cooked bacon, minimize into small items. The bacon provides an exquisite salty crunch and richness to the ultimate dish.
Your selfmade paprika chicken paprikash sauce is now ready to be served over your favourite pasta, dumplings, or alongside your perfectly cooked chicken.
Combining Chicken and Sauce
Making Chicken Paprikash begins with deciding on high-quality chicken items. Bone-in, skin-on thighs and drumsticks supply the richest taste, but boneless, skinless breasts can be utilized for a leaner dish. Cut the chicken into bite-sized pieces for even cooking.
Homemade paprika is crucial for genuine Paprikash. The process entails roasting sweet peppers till deeply caramelized, then drying, grinding, and sifting them. The resulting paprika could have a deep, advanced taste far superior to store-bought varieties.
Start the sauce by sautéing onions and garlic in lard or butter till softened and translucent. This forms the fragrant base of the Paprikash. The gradual cooking process permits the flavors to meld collectively perfectly.
Next, add the selfmade paprika to the onion combination. Stir constantly for a minute or two to forestall burning, as paprika can scorch easily and impart a bitter style. This step releases the paprika’s full aroma and shade.
Slowly incorporate flour into the paprika combination, making a roux. The flour thickens the sauce, providing physique and texture. Continue stirring until the roux is easy and evenly coloured.
Gradually whisk in the chicken broth or inventory. Use sufficient liquid to create a sauce of your required consistency. A rich, hearty sauce is characteristic of Chicken Paprikash.
Season the sauce with salt, black pepper, and a pinch of caraway seeds for added depth of flavor. Caraway complements the paprika fantastically.
Now add the chicken pieces to the sauce, guaranteeing they’re absolutely submerged. Bring the combination to a simmer, then cut back the warmth to low, cover, and prepare dinner gently for a minimum of an hour, or till the chicken is cooked by way of and tender. The longer it simmers, the more flavorful the chicken will become.
For additional richness, you’ll have the ability to stir in a dollop of sour cream or crème fraîche in the course of the tip of the cooking time. This adds a creamy texture and a refined tang that balances the paprika’s sweetness.
Once the chicken is cooked and the sauce has thickened to your liking, taste and adjust the seasoning as needed. You might want to add more salt, pepper, or maybe a touch extra paprika relying on your desire.
Traditionally, Chicken Paprikash is served with spaetzle or dumplings. The starchy aspect dish soaks up the scrumptious sauce, making for a satisfying and flavorful meal. A sprinkle of recent parsley provides a vibrant green contrast and a pop of freshness.
The fantastic factor about Paprikash is its versatility. You can adjust the spice degree by including a pinch of cayenne pepper for a spicier version. You also can add different vegetables, corresponding to carrots or potatoes, for a heartier dish.
Remember, the key is slow cooking. Allow the flavors to develop slowly over time for one of the best outcomes. This will make positive that the chicken is tender and the sauce is rich and flavorful. The do-it-yourself paprika is the star, letting its unique character shine by way of.
Finally, serve sizzling and enjoy the fruits of your labor. This selfmade Chicken Paprikash, made with your own paprika, might be a dish your family will cherish.
Begin by choosing a chicken; bone-in, skin-on pieces are good for reaching most taste and tenderness by way of gradual simmering. About 1.5 to 2 pounds will serve two generously.
Generously salt and pepper the chicken pieces. This seasoning will penetrate the meat as it cooks, enhancing the overall flavor profile.
In a large, heavy-bottomed pot or Dutch oven, heat a generous amount of high-quality lard or duck fats (about 2 tablespoons). Alternatively, you have to use a neutral-flavored oil like canola, but the rendered fats will add a richness that oil cannot replicate.
Sear the chicken pieces in batches, guaranteeing that they develop an attractive golden-brown crust. Don’t overcrowd the pot; this will lower the temperature and result in steaming as a substitute of searing. Set the seared chicken apart.
To make the paprika, rigorously toast 1 cup of candy paprika in a dry skillet over medium-low warmth for about 5-7 minutes, stirring constantly, till aromatic. Be careful to not burn it, as this will impart a bitter style. This toasting enhances the flavor and aroma.
Once toasted, grind the paprika coarsely utilizing a mortar and pestle or a spice grinder. This is crucial; coarsely ground paprika adds a depth of taste and texture that finely ground paprika simply cannot achieve.
Add 1 large onion, finely chopped, to the pot and sauté until softened and translucent, about 5-7 minutes. Add 2-3 cloves of garlic, minced, and sauté for an additional minute till fragrant.
Stir in 2 tablespoons of candy Hungarian paprika (in addition to the do-it-yourself paprika), 1 tablespoon of smoked paprika (optional, but adds a wonderful smoky note), and 1 teaspoon of caraway seeds. Cook for an additional minute, stirring constantly, to bloom the spices and release their aromas.
Pour in 1 cup of dry white wine (like Sauvignon Blanc or Pinot Grigio) and scrape the underside of the pot to deglaze, ensuring that each one the browned bits are incorporated into the sauce. This step provides depth and complexity to the flavour.
Add four cups of chicken broth (homemade is best, however store-bought will work in a pinch), 1 giant bay leaf, and a beneficiant pinch of cayenne pepper (optional, for a touch of heat).
Return the seared chicken to the pot. Bring the combination to a simmer, then cut back the heat to low, cowl, and prepare dinner for no less than 1.5 to 2 hours, or until the chicken is extremely tender and simply falls off the bone.
During the simmering process, check the liquid level occasionally. If it reduces too much, add a little extra chicken broth to take care of a braising liquid.
Once the chicken is cooked through, take away it from the pot and set aside. Skim off any extra fat from the surface of the sauce.
To thicken the sauce, you’ll be able to take away about 1 cup of the sauce and whisk it with 1-2 tablespoons of all-purpose flour or cornstarch till clean. Return this combination to the pot and simmer for a few minutes, or till the sauce reaches your required consistency. Alternatively, you presumably can simmer the sauce uncovered for an extended period until it thickens naturally.
Return the chicken to the pot, permitting it to coat within the luscious sauce. Serve hot, garnished with contemporary parsley or sour cream, if desired.
Serve this Chicken Paprikash together with your favorite sides, such as egg noodles, dumplings, or mashed potatoes. Enjoy!
Serving the Chicken Paprikash
Chicken paprikash, particularly when made with homemade paprika, deserves a presentation as vibrant and flavorful as its style. Serving it properly elevates the entire eating expertise.
First, consider the serving vessel. A classic Dutch oven, still simmering gently on the stovetop, adds a country charm and retains the paprikash warm. Alternatively, a large, shallow bowl allows for higher visibility of the rich sauce and tender chicken.
The most elementary facet is the chicken itself. Ensure the chicken pieces are sizable and cooked by way of, however still juicy. Avoid overly small or fragmented pieces, as they’ll get misplaced in the sauce.
Now, let’s explore garnishes. These should complement, not overpower, the paprika’s bold taste:
Fresh Herbs: A sprinkle of finely chopped fresh parsley or dill provides a brilliant, herbaceous notice that cuts through the richness of the sauce. Chives also work nicely.
Sour Cream or Crème Fraîche: A dollop of sour cream or crème fraîche provides a pleasant tang and creamy texture, balancing the paprika’s intensity. For a richer experience, contemplate infusing the bitter cream with a contact of finely grated horseradish.
Lemon Wedge: A easy lemon wedge offers a contrasting acidity that brightens the dish and cleanses the palate. Squeezing somewhat fresh lemon juice over individual servings provides one other layer of taste complexity.
Caraway Seeds: A delicate dusting of caraway seeds provides an earthy, barely sweet aroma and enhances the paprika fantastically. These are particularly efficient if you’ve used a smoked paprika in your recipe.
Paprika Dusting: A light dusting of extra selfmade paprika, perhaps a unique variety for distinction (e.g., sweet paprika alongside the smoked paprika used within the dish), provides visible attraction and a deeper paprika flavor.
Roasted Vegetables: Consider adding roasted vegetables, such as bell peppers, onions, or carrots, to the dish or serving them as a facet. Their sweetness and slightly charred flavor create a pleasant contrast to the creamy sauce.
Egg Noodles or Dumplings: Chicken paprikash is traditionally served with egg noodles. Consider adding a variety of the noodles directly to the paprikash during the previous couple of minutes of cooking for a richer, extra cohesive dish. Alternatively, serve the paprikash over a mattress of egg noodles or with small dumplings alongside.
Pickled Vegetables: A small serving of pickled greens, corresponding to gherkins or onions, presents a refreshing distinction to the richness of the paprikash. This added layer of acidity and texture enhances the general eating expertise.
Presentation matters. Arrange the chicken items attractively in the serving dish, making certain the sauce coats them generously. Garnishes should be added thoughtfully, not haphazardly. Consider the visual impact in addition to the flavour combos.
Remember, much less is commonly extra. Choose a couple of well-chosen garnishes that complement the paprika’s flavor profile, somewhat than overwhelming it. The focus ought to at all times remain on the star of the show: your delicious homemade chicken paprikash.
Chicken paprikash, especially when made with homemade paprika, deserves a presentation that displays its wealthy taste and vibrant shade. The secret is to serve it hot, permitting the paprika’s aroma to totally unfurl.
Traditionally, Chicken Paprikash is served in a shallow bowl or on a plate, permitting the sauce to generously coat the chicken pieces. Don’t overcrowd the plate; go away some house to showcase the gorgeous color of the dish.
Garnish generously. A dollop of sour cream or crème fraîche adds a cooling contrast to the spicy paprika. Freshly chopped parsley supplies a bright, herbaceous observe, whereas a sprinkle of paprika enhances the color and provides a subtle smoky taste.
Consider the perimeters fastidiously. Dumplings (nokedli) are a basic accompaniment, their soft texture offering a stunning counterpoint to the wealthy sauce. Serve them alongside, not blended in, to keep up their particular person character.
Another glorious alternative is spaetzle, small egg noodles that take in the paprika sauce beautifully. Their barely nutty flavor enhances the chicken and paprika without overpowering them.
Fluffy boiled potatoes, seasoned simply with salt and butter, provide a impartial base that enables the paprikash to shine. Their starchy texture contrasts beautifully with the tender chicken and creamy sauce.
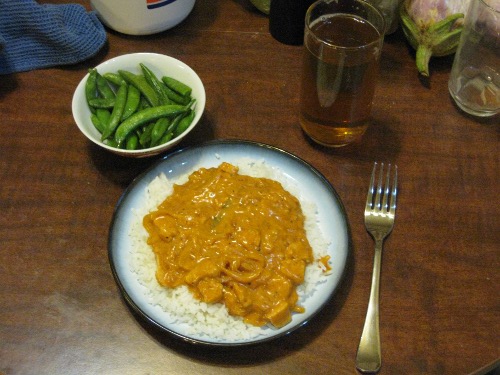
For a more substantial meal, think about serving a side of steamed green beans or roasted vegetables. The green vegetables present a welcome visible and textural contrast to the richness of the paprikash.
A easy cucumber salad, flippantly dressed with vinegar and herbs, provides a refreshing counterpoint to the heavier components of the dish. The acidity cuts via the richness of the sauce, cleaning the palate between bites.
Bread is important. A crusty rustic bread, preferably a sourdough or a rye, is good for soaking up the flavorful sauce. Ensure it is served heat, enhancing its texture and aroma.
Finally, presentation issues. Use attractive serving dishes that complement the color of the paprikash. A easy, elegant setting will enhance the dining experience, allowing your homemade Chicken Paprikash to take center stage.
Remember, the goal is to create a balanced and harmonious meal the place every factor enhances the others, showcasing the deliciousness of your homemade Chicken Paprikash.
Don’t be afraid to experiment with completely different facet dishes to find your excellent combination. The beauty of Chicken Paprikash lies in its adaptability, allowing for a broad range of complementary flavors and textures.
No matter your chosen sides, ensure every little thing is served scorching and contemporary, permitting your friends to totally respect the flavors and aromas of this basic Hungarian dish.