Secrets To Achieving The Perfect Texture In Keto Chocolate Mousse
Understanding Keto-Friendly Ingredients
Achieving the proper texture in keto chocolate mousse hinges on understanding the interaction of fat, sweeteners, and emulsifiers, all while remaining inside the ketogenic dietary framework.

The basis of any profitable keto chocolate mousse lies in the choice of fat. Full-fat coconut milk is a popular option, offering both richness and creaminess. Its excessive saturated fats content material contributes to an expensive mouthfeel. Heavy cream is one other wonderful selection, providing an analogous effect, but with a slightly totally different flavor profile.
Avocado can surprisingly act as a unbelievable fats source and emulsifier, contributing to a smoother texture. Its gentle taste blends seamlessly with the chocolate, and its creamy consistency adds to the general texture.
Beyond fat, emulsifiers play an important function in stopping separation and making certain a uniform, smooth mousse. Lecithin, typically derived from soy or sunflower, is a common choice and helps to bind the components together, preventing the separation of fat and water elements.
Careful consideration must be given to the sweetener. Many keto-friendly sweeteners exist, every with its own influence on texture. Erythritol, for instance, tends to be much less sweet than others and does not considerably impression the mousse’s texture. However, it can typically impart a slightly cooling sensation.
Monk fruit sweetener, while intensely sweet, also can have an effect on texture slightly relying on the model and concentration. Stevia, although very sweet, must be used sparingly, as even a small quantity can leave a barely bitter aftertaste that detracts from the chocolate’s richness.
Allulose is gaining popularity in keto baking because of its capacity to imitate the texture and sweetness of sucrose more carefully than other keto sweeteners. It tends to not crystallize, which is a plus for creamy desserts like mousse.
The ratio of sweetener to fats is crucial. Too much sweetener can lead to a grainy texture, whereas too little will end in a less candy and potentially bland mousse. Experimentation and discovering the perfect stability in your preferred sweetener is essential.
Chocolate is the star of the show, so choosing a high-quality darkish chocolate (70% cacao or higher) is essential. The greater cacao percentage contributes to a more intense chocolate flavor and richer texture, whereas also minimizing the necessity for added sweetener.
Proper chilling is important. Allowing the mousse to set in the fridge for a quantity of hours, or even overnight, will allow the fat to solidify, resulting in a firm yet nonetheless velvety easy texture. Avoid over-chilling, however, as this might result in a texture that is too dense.
Finally, incorporating air gently during the mixing process is necessary. Overmixing can incorporate an extreme quantity of air and lead to a mousse that’s ethereal and light-weight, but potentially unstable and vulnerable to separation. Gentle folding and careful mixing methods are key to reaching the perfect balance.
By understanding the properties of every ingredient and mastering the techniques of blending and chilling, one can unlock the secrets to crafting an opulent, smooth, and completely textured keto chocolate mousse that delights both the palate and adheres to dietary restrictions.
Achieving the proper texture in keto chocolate mousse hinges on a deep understanding of keto-friendly ingredients and, crucially, the number of fat.
The richness and creaminess of a standard chocolate mousse stem from the utilization of heavy cream and/or butter, both high in saturated fat. In keto, we preserve this concentrate on wholesome fats, however with a conscious strategy to their sort and ratio.
Full-fat coconut milk is a staple. Its creamy texture and wealthy coconut flavor (which can be surprisingly complementary to chocolate) provide a luscious base. The kind matters: full-fat canned coconut milk, not the light or low-fat versions, offers the required fats content.
Avocado oil, while not including a noticeable taste, lends a velvety smoothness that contributes significantly to the mousse’s texture. Its high monounsaturated fat content emulsifies nicely, making a steady and opulent mouthfeel.
Butter, ideally unsalted and grass-fed for its superior taste and nutrient profile, adds richness and a slightly tangy note that balances the sweetness of the chocolate. The fat content material in butter contributes to the mousse’s construction and prevents it from becoming watery.
Avoiding certain fats is equally essential. Polyunsaturated fats, whereas wholesome carefully, can interfere with the desired texture. Oils like soybean oil or sunflower oil are greatest avoided, as they can lead to a much less stable and less creamy mousse.
The ratio of these fats is critical. Too much coconut milk would possibly result in a slightly grainy texture, whereas too much butter would possibly make the mousse overly dense. Experimentation is key to finding the perfect balance, which will depend upon the specific recipe and desired level of richness.
Beyond the fats, the choice of sweetener profoundly impacts texture. Erythritol, for instance, tends to crystallize more readily than other keto-friendly sweeteners, potentially leading to a slightly gritty mousse if not handled correctly. Stevia or monk fruit, while less susceptible to crystallization, might require careful temperature control throughout preparation to keep away from altering the mousse’s consistency.
Furthermore, the process of whipping the cream and incorporating the opposite components is important for a easy, ethereal texture. Over-whipping can introduce air bubbles that end in a less dense and probably grainy mousse. Under-whipping, conversely, will depart the mousse too heavy and lacking in that signature lightness.
Finally, chilling the mousse is crucial for setting. Sufficient chilling time permits the fats to solidify, creating the desired firm-yet-velvety texture. The colder the mousse, the firmer it will be, offering control over the desired ultimate consistency.
In conclusion, the perfect keto chocolate mousse is a fragile balance between the best fats choice, precise ingredient ratios, and careful preparation strategies. Understanding the function of every component, from the type of coconut milk to the strategy of whipping, is paramount to attaining that decadent, melt-in-your-mouth texture.
Achieving the perfect texture in keto chocolate mousse hinges on understanding keto-friendly components and the way they work together.
Firstly, your choice of cocoa powder is paramount. Unsweetened cocoa powder is a keto staple, however not all are created equal.
Dutch-processed cocoa powder, with its alkalized nature, offers a richer, deeper, much less acidic taste profile, perfect for an expensive mousse. However, it could typically result in a barely less ethereal texture in comparison with natural cocoa.
Natural cocoa powder, however, maintains extra of the cocoa bean’s pure acidity, resulting in a brighter, tangier taste. This could be balanced with sweeteners and fat, however the texture may be barely much less dense.
The fats content in your recipe plays a crucial function in achieving that velvety clean consistency. Avoid using overly saturated fats, which may create a grainy texture. Instead, go for wholesome keto-friendly fat like avocado oil, MCT oil, or full-fat coconut milk.
Coconut cream, especially the thick half skimmed from the highest of a can, contributes significantly to a rich, creamy mousse. The larger fats content lends itself to an incredibly decadent mouthfeel.
Heavy whipping cream is another glorious selection, providing each fats and airiness. Properly whipped cream creates volume and lightness without compromising richness.
Sweeteners impact texture not directly. While erythritol and monk fruit are well-liked decisions for their minimal impact on blood sugar, they don’t necessarily contribute to a creamy texture the way in which sugar does. Balancing them with other ingredients is key.
Consider utilizing a small quantity of powdered sweetener to assist with the sleek incorporation of cocoa powder. Too much can lead to a gritty result.
The process of incorporating ingredients is just as very important. Gentle folding techniques are crucial to maintain airiness. Vigorous mixing can result in a dense, compact mousse.
Start by whisking your chosen fats (coconut cream, heavy cream, and so forth.) till delicate peaks form. Then, gently fold within the cocoa powder combination (cocoa, sweetener, a touch of liquid if needed) making certain no lumps remain. Over-mixing introduces air bubbles, resulting in a less clean texture.
Chill time is important. Allowing the mousse to sit back in the refrigerator for a minimal of a couple of hours allows the fat to solidify, leading to a firmer, extra set mousse. This additionally intensifies the flavors.
Experimentation is essential. Keep notes of your ingredient ratios and strategies to refine your recipe over time. Slight variations in fat sort, cocoa powder type, and sweetener can significantly impact the final texture.
Here’s a summarized guidelines for perfect Keto Chocolate Mousse texture:
- Choose your cocoa powder correctly (Dutch-processed for richer texture, natural for brighter flavor).
- Use high-quality keto-friendly fat like avocado oil, MCT oil, coconut cream, or heavy whipping cream.
- Select sweeteners carefully, avoiding overly grainy options.
- Use gentle folding methods to include components.
- Chill completely to allow the mousse to set and the flavors to develop.
Mastering these aspects will unlock the secrets to creating a flawlessly smooth and decadent Keto Chocolate Mousse.
Mastering the Emulsification Process
Mastering the emulsification course of is essential for reaching a luxuriously clean and silky texture in your keto chocolate mousse. This includes creating a stable mixture of two normally immiscible liquids – on this case, the fat (typically heavy cream or coconut cream) and the watery section (often containing cocoa powder, sweetener, and any flavourings).
Begin with the very best high quality ingredients. The freshness and fat content material of your cream instantly impression the ultimate texture. Stale or low-fat cream will lead to a less secure emulsion and a grainy mousse.
Precise temperature control is key. Chilling your bowls and whisk before you begin helps forestall premature separation. Ideally, all your elements should be very chilly, however not frozen, to make sure a easy and consistent emulsion.
The order of mixing issues. Gradually incorporating one ingredient into another rather than combining them all of sudden helps avoid clumping and ensures a smoother end result. Start by whisking the fat (heavy cream) until gentle peaks kind. Then, slowly incorporate the moist elements, somewhat at a time, whisking constantly.
Use the proper tools. A sturdy whisk, ideally a balloon whisk, is vital for proper incorporation. A stand mixer can additionally be used on low velocity, however be careful not to overmix.
Gentle and patient whisking is crucial. Avoid vigorous or overly rapid whisking as this could incorporate too much air, creating a mousse that’s airy however lacks richness and potentially separates.
Understand the function of emulsifiers. While not strictly essential, a small amount of an emulsifier like lecithin (found in soy lecithin or sunflower lecithin) can considerably enhance the stability of your emulsion and the silkiness of the ensuing mousse. Use sparingly, as too much can alter the flavour.
Avoid over-mixing. Over-whisking breaks down the fats construction and creates a much less creamy, more whipped texture. Stop whisking when the combination achieves the specified consistency.
Proper chilling is important. After mixing, gently transfer the mousse to individual serving dishes and refrigerate for no less than 2-4 hours to permit it to set and totally develop its smooth texture. This chilling time allows the fats molecules to solidify properly and create a cohesive structure.
Consider using stabilizers. Ingredients like gelatin or agar-agar, used judiciously, can help create a firmer, much less prone-to-separation mousse, but use cautiously as too much can lead to a gummy texture.
Troubleshooting: If your mousse is grainy, it’s doubtless as a end result of poor emulsification. Try repeating the process with colder ingredients and using a smoother whisking method. If it is too ethereal, you probably over-whipped; attempt a gentler hand next time. If it’s too runny, refrigerate for longer or think about adding a stabilizer.
For attaining a truly decadent and splendid keto chocolate mousse, keep in mind:
- Use high-quality, cold ingredients.
- Employ a gradual and mild whisking technique.
- Control the temperature precisely.
- Chill thoroughly for optimum setting and texture.
- Consider adding a small amount of emulsifier for stability.
By paying shut consideration to these particulars, you’ll have the ability to grasp the emulsification process and create a keto chocolate mousse with an irresistibly smooth and silky texture.
Creating a flawlessly smooth and creamy keto chocolate mousse requires mastering the artwork of emulsification. This is essential as a outcome of the absence of traditional emulsifiers like eggs usually found in regular mousse recipes necessitates careful attention to approach and ingredient selection.
The basis of a profitable keto chocolate mousse lies in reaching a stable emulsion of fats and water. The fat, usually derived from full-fat coconut milk or heavy cream, needs to be completely blended with the aqueous phase, which regularly consists of cocoa powder, sweetener (like erythritol or stevia), and probably a flavoring extract.
One of the most common pitfalls is utilizing elements at totally different temperatures. Ideally, all parts should be very chilly, significantly the fats source. Chilling the fat helps decelerate the melting process and provides you extra time to achieve a secure emulsion before the fat separates.
The selection of blender is also pivotal. A high-powered immersion blender or a stand mixer with a whisk attachment are superior to a regular blender for this task. The more powerful the blending motion, the better the emulsion achieved.
Gradual addition of components is key. Don’t simply dump every thing in at once! Begin by slowly blending the fat supply till it’s gentle and fluffy. Then, steadily incorporate the other components, scraping down the edges of the bowl incessantly to make sure complete incorporation.
Another method is to use a slightly thickened aqueous phase. You can obtain this by dissolving the sweetener and cocoa powder in a small amount of sizzling water (or other liquid) and allowing it to cool barely earlier than combining it with the fats.
Over-mixing can ironically be detrimental. While thorough blending is required for emulsification, extreme mixing can incorporate an excessive quantity of air, resulting in a grainy texture and probably inflicting separation. Stop blending as soon as a smooth, creamy consistency is achieved.
The addition of a small amount of lecithin can significantly enhance emulsification. Lecithin, a natural emulsifier, promotes the binding of fat and water, resulting in a smoother, more stable mousse. However, even with out it, correct approach is crucial.
Preventing separation typically comes right down to choosing the right fats content. Full-fat coconut milk is mostly most well-liked because of its greater fat content and unique properties which lend themselves properly to emulsification. Heavy cream additionally works well however would possibly require even more consideration to element in the emulsification process.
Once the mousse is ready, immediate refrigeration is crucial. This helps solidify the emulsion and maintain its texture. Avoid freezing, as ice crystals could compromise the graceful texture. If separation nonetheless occurs slightly, a fast whisk before serving will often restore the creamy consistency.
Finally, understanding the behaviour of your components is significant. Experimentation with ratios and methods will lead to mastery of the process and yield that good, smooth, and creamy Keto chocolate mousse.
Here’s a abstract of key steps:
- Use cold components.
- Employ a high-powered blender.
- Gradual addition of elements.
- Avoid over-mixing.
- Consider using lecithin.
- Refrigerate immediately.
By following these tips, you’ll unlock the secrets to attaining the right texture and avoid the frustration of a separated or grainy keto chocolate mousse.
Mastering emulsification is paramount to achieving a luxuriously smooth and creamy keto chocolate mousse. This course of includes creating a stable combination of two immiscible liquids – on this case, the fats (typically heavy cream or coconut cream) and the aqueous section (containing cocoa powder, sweetener, and presumably eggs).
The key lies in reducing the floor pressure between the fat droplets and the water, permitting them to disperse evenly with out separating. This is where correct whisking and folding methods play a crucial position.
Whisking, usually employed within the initial stages, introduces air into the combination, making a lighter texture and helping to interrupt down fats globules into smaller sizes. The vigorous movement of the whisk creates turbulence, facilitating the dispersion of the fat all through the aqueous part. For a keto chocolate mousse, this might involve whisking the heavy cream to delicate peaks earlier than incorporating other elements. The speed and length of whisking are critical; over-whisking can lead to a grainy texture, while under-whisking results in a much less emulsified, doubtlessly separated product.
Folding, a gentler technique, is typically used later in the process to include the whipped cream (or other emulsified component) into the remaining elements without deflating the air incorporated throughout whisking. This technique involves a scooping movement, gently turning the combination over itself, incorporating the elements gradually and with out incorporating an extreme quantity of air. The aim is to create a homogeneous combination with out breaking down the fragile structure of the whipped cream, preserving the lightness and airiness.
The alternative of apparatus can also have an effect on the emulsification course of. A whisk with skinny wires offers higher air incorporation in comparability with a whisk with thicker wires. Likewise, the bowl material and dimension can influence the general result. Using a relaxing bowl, for example, may help stabilize the whipped cream, guaranteeing a smoother and extra stable emulsion.
Careful temperature control is essential throughout the method. Overly warm ingredients can hinder emulsification, doubtlessly resulting in separation. Conversely, extremely chilly ingredients may make it tough to achieve a easy texture. Working with components at a constant, barely chilled temperature normally yields the most effective outcomes.
Ingredient ratios are another essential issue. The proportion of fat to water influences the final texture. Too a lot fats may lead to a heavy, greasy mousse, whereas too little fat can lead to a watery, less luxurious consistency. Recipes should be followed fastidiously, paying close consideration to the required portions.
The kind of fat additionally issues. Heavy cream, as a result of its excessive fat content, creates a richer, more decadent mousse in comparison with alternate options like coconut cream which can supply a slightly totally different taste and texture. Understanding these nuances and adapting the method accordingly ensures success.
Finally, patience and apply are key to mastering the emulsification course of. Don’t be discouraged if your first makes an attempt aren’t excellent. Experiment with different whisking and folding techniques, paying shut consideration to the feel and consistency of the mixture. With time and expertise, you will develop a really feel for reaching the perfect emulsified base for a flawlessly easy and delectable keto chocolate mousse.
Consider the addition of emulsifiers like lecithin (found in some cocoa powders or out there separately) to additional improve the stability of the emulsion. Even a small amount can considerably enhance the consistency and forestall separation.
Beyond the technical aspects, remember to use high-quality components. The richer the cocoa powder and the creamier the heavy cream, the extra decadent the ultimate product will be. This attention to detail elevates the general expertise and contributes to a very distinctive keto chocolate mousse.
Chilling and Setting Techniques
Achieving the right texture in keto chocolate mousse hinges on meticulous chilling and setting strategies, optimizing the cooling course of to create a smooth, creamy, and stable dessert.
The initial chilling part is essential. Rapid cooling prevents the formation of enormous ice crystals, which lead to an icy, grainy texture. A shallow, wide container maximizes surface space, selling even cooling and quicker setting.
Consider using an ice bath. Surrounding the mousse bowl with ice water significantly accelerates the chilling course of, guaranteeing a persistently smooth texture throughout. Ensure the bowl’s base is in direct contact with the ice.
For a more controlled chill, refrigerate the mousse uncovered for the preliminary 30-60 minutes. This allows for floor evaporation, which contributes to a slightly firmer texture. Then, cover the mousse and proceed chilling till absolutely set.
The type of container influences chilling effectivity. Metal bowls conduct cold better than glass or plastic, leading to sooner cooling. However, glass provides better visibility to observe the setting progress.
Don’t overcrowd the fridge. Adequate airflow around the mousse container is crucial for uniform cooling. Avoid placing it close to the freezer compartment or other heat-generating home equipment.
Careful attention to the mousse’s initial consistency is paramount. Over-whipping the cream or incorporating an extreme amount of air can lead to a less secure mousse that struggles to take care of its texture throughout chilling.
The particular chilling time depends on factors such as the ambient temperature, the volume of the mousse, and the specified firmness. Regularly verify the mousse for doneness, avoiding over-chilling, which may make it excessively agency and fewer appealing.
A gentle tilt test can indicate readiness. If the mousse barely trembles when the container is gently tilted, it’s probably perfectly set. If it nonetheless wobbles significantly, it requires extra chilling.
For a extra refined texture, contemplate a final resting interval after the mousse has set. Allowing it to rest within the refrigerator for a minimal of an hour after attaining the desired firmness will enhance its stability and prevent any sudden softening upon serving.
Temperature management throughout the whole process is key. Minimize temperature fluctuations by avoiding sudden temperature shifts, such as transferring the mousse from a heat environment to a really chilly one. Gradual cooling produces a smoother, much less icy texture.
Experimentation is key to mastering this system. Record your chilling times and temperatures to refine your course of and determine the optimum conditions on your specific recipe and kitchen surroundings.
Proper chilling does not simply set the mousse; it refines the overall sensory experience, leading to a luxuriously clean, melt-in-your-mouth dessert that’s both visually interesting and exquisitely scrumptious.
Beyond basic refrigeration, think about using a controlled-temperature surroundings like a blast chiller for significantly quicker and extra exact setting. This professional-level method minimizes ice crystal formation, creating an exceptionally clean texture.
Remember that the fats content in your keto-friendly ingredients significantly impacts setting. Ensure you are using high-fat cream and chocolate to attain the desired richness and stability.
Finally, endurance is a advantage when it comes to attaining the perfect mousse. Avoid speeding the chilling process. A well-chilled mousse will reward you with a texture that is far superior to at least one that has been improperly or rapidly cooled.
Achieving a flawlessly clean, creamy texture in keto chocolate mousse requires cautious consideration to chilling and setting techniques, alongside methods to stop the dreaded crystallization of the fats.
Chilling: The chilling process is crucial for setting the mousse and enhancing its texture. Avoid merely putting the mousse within the fridge and leaving it; this will result in uneven setting and a grainy outcome. Instead, think about using a shallow, extensive container to maximize floor space for environment friendly cooling. This permits for quicker, more even chilling, preventing the center from changing into overly liquid whereas the perimeters set prematurely. A shallower container promotes uniform temperature discount, avoiding temperature gradients that contribute to a less constant texture.
Strategic Chilling: For notably rich mousses, a staged chilling strategy might prove beneficial. Begin with a brief interval within the refrigerator (perhaps 30-60 minutes), followed by a transfer to the freezer for a shorter burst to agency up the mousse slightly earlier than returning it to the refrigerator for the ultimate chilling. This methodology helps keep away from overly firm edges whereas guaranteeing a correctly set middle. Monitoring the mousse’s consistency is crucial during this course of.
Setting: The setting course of relies closely on the fat content of your keto-friendly elements. Using high-quality, appropriately tempered fats is paramount. If using coconut cream, making certain it’s properly chilled before whipping is crucial for achieving steady peaks and preventing separation. Over-whipping can incorporate too much air, resulting in a less dense, probably icy texture upon setting.
Preventing Crystallization: Crystallization, a common issue with fat-based desserts, manifests as a grainy or sandy texture. This happens when fats molecules reorganize right into a crystalline structure during cooling. Minimizing crystallization requires a number of strategies.
Fat Selection: Opt for fats with a high proportion of unsaturated fat, that are much less susceptible to crystallization. Avocado oil, for instance, is a good possibility, albeit with a subtle taste that might not complement all chocolate profiles. Coconut cream, whereas widespread, may be difficult; guarantee it’s very cold and avoid over-whipping.
Temperature Control: Maintain constant temperatures throughout the preparation course of. Avoid temperature fluctuations by using chilled bowls and utensils. Rapid temperature shifts are a major contributor to crystallization.
Emulsification: Proper emulsification is crucial for a stable mousse. This includes thoroughly combining the fat and liquid elements to create a smooth, homogenous combination. A hand mixer is right for this, because it avoids over-mixing which may also result in crystallization. Gentle, consistent mixing is essential.
Adding Stabilizers (Optional): While not strictly needed, incorporating small quantities of stabilizers like xanthan gum or guar gum can help stop crystallization and keep a clean, creamy texture. Use these sparingly, as excessive amounts can result in a gummy consistency.
Avoid Over-Mixing: Once the mousse is sufficiently whipped, refrain from further mixing. Over-mixing incorporates excessive air, which may destabilize the emulsion and promote ice crystal formation throughout chilling.
Gentle Handling: After chilling and setting, deal with the mousse gently to avoid disrupting the delicate structure. Use a spatula to transfer it to serving dishes, minimizing agitation.
Proper Storage: Store the mousse in an hermetic container in the refrigerator. Allow it to come to room temperature barely earlier than serving for optimum texture and taste. This prevents a surprising temperature change that would once more promote crystallization.
By meticulously controlling the chilling and setting course of, fastidiously selecting elements, and employing appropriate strategies to stop crystallization, you can consistently obtain an ideal, luxurious texture in your keto chocolate mousse.
Achieving the perfect texture in keto chocolate mousse hinges on mastering chilling and setting methods. The objective is a firm, but silky smooth, mousse that doesn’t separate or turn out to be icy.
Chilling is crucial for two causes: it permits the fat to solidify, creating the desired structure, and it prevents the mousse from turning into overly ethereal and shedding its richness.
The initial chill must be transient, ideally just lengthy sufficient to allow the mousse to thicken slightly, sometimes around 30-60 minutes. This prevents ice crystal formation during the main chilling interval.
Over-chilling can result in a grainy texture. The objective is a gentle firming, not a stable block. This initial chill also stabilizes the emulsion.
Setting entails a longer chill, often a quantity of hours or even in a single day, within the fridge. This permits the fat molecules to totally bind and create a steady, firm construction. This longer chill is what truly achieves that mousse-like consistency.
The alternative of fat source significantly influences setting. Heavy cream, coconut cream, and even avocado oil, when used accurately, contribute to the firmness and mouthfeel. Consider utilizing a mixture to realize optimum texture.
The temperature of your components before combining issues. Cold elements contribute to a smoother, extra easily chilled combination. Room temperature ingredients are more probably to result in an ethereal, much less agency result.
Proper mixing technique is important for achieving the perfect construction. Over-mixing incorporates too much air, resulting in a much less dense, much less firm mousse. Gentle folding and stirring are essential.
Consider using a stabilizer like xanthan gum or gelatin. These may help stop separation and improve the final firmness, however use them sparingly to keep away from a gummy texture.
Container selection additionally performs a small position. Individual serving ramekins, particularly if you’re planning on garnishing them, enable for even chilling, and infrequently present a extra elegant presentation. Larger containers require an extended chilling interval for even setting.
Here’s a summary of key chilling and setting concerns:
- Initial Chill: 30-60 minutes, prevents ice crystals
- Main Chill/Setting: Several hours to in a single day, develops firmness
- Temperature Control: Cold components are crucial
- Gentle Mixing: Avoid over-mixing to maintain density
- Fat Source: Carefully choose high-fat options
- Stabilizers (Optional): Xanthan gum or gelatin in small amounts
By fastidiously controlling the chilling and setting processes and listening to the details, you’ll have the ability to grasp the artwork of creating a keto chocolate mousse with the perfect texture.
Remember that experimentation is key! Adjust chilling instances based in your particular ingredients and ambient temperature to seek out what works greatest for you and your kitchen.
Don’t be discouraged by preliminary imperfections; the key to mastering any recipe, particularly one as delicate as chocolate mousse, lies in practice and listening to the little things.
Flavor Enhancement and Variations
While the focus is on texture in keto chocolate mousse, achieving the “good” mousse also hinges closely on flavor enhancement and variations. This is where extracts and spices become invaluable instruments.
Vanilla extract is a traditional alternative, adding depth and warmth. Consider experimenting with completely different vanilla sorts – Madagascar bourbon vanilla presents a richer, extra complicated taste profile compared to Mexican vanilla’s sweeter, brighter notes.
Almond extract can provide a refined nutty complexity that enhances the chocolate beautifully. Use it sparingly, as slightly goes a good distance; its intense aroma can easily overpower the chocolate.
For a more refined palette, explore extracts like peppermint, orange, or even coffee. Peppermint can create a refreshing contrast to the richness of the chocolate, particularly in a dark chocolate mousse. Orange extract introduces a bright citrusy notice, cutting by way of the chocolate’s depth, whereas espresso extract provides a robust, grown-up flavor dimension.
Beyond extracts, spices provide one other avenue for flavor exploration. A pinch of cinnamon adds heat and delicate spiciness, pairing well with darkish chocolate. Cayenne pepper, used extremely sparingly, can introduce a shocking kick that enhances the chocolate’s richness without making the mousse overtly spicy.
Ground cardamom, with its warm, slightly candy aroma, can create an intriguing complexity in a milk chocolate or white chocolate keto mousse. A touch of nutmeg provides a subtle earthiness and warmth, significantly efficient when combined with cinnamon.
For a more adventurous method, think about using spices like ginger or cloves. Ginger, with its vibrant, barely pungent flavor, can create a novel and surprising twist, while cloves introduce a potent, heat spiciness, finest utilized in very small amounts.
The key to successfully incorporating extracts and spices lies in aware experimentation and precise measurements. Start with small quantities and gradually increase till you obtain your required taste profile. Always taste as you go, making adjustments primarily based in your preferences.
Consider the type of chocolate you are utilizing. Dark chocolate lends itself properly to bolder spices and extracts, while milk chocolate benefits from more delicate flavors. White chocolate offers a blank canvas for experimentation, allowing you to create actually distinctive flavor combos.
Furthermore, think about complementary taste pairings. If you’re utilizing orange extract, consider adding a touch of cinnamon for heat. If you’re using peppermint, a hint of dark chocolate’s bitterness will balance the sweetness and mint.
Remember that the standard of your extracts and spices will influence the overall taste of your mousse. Opt for high-quality elements for one of the best results. Freshly ground spices often impart a extra vibrant taste than pre-ground varieties.
Finally, don’t be afraid to experiment! The fantastic thing about culinary creation lies in exploring different taste combinations and discovering your individual distinctive signature mousse. Keep detailed notes of your experiments, noting ingredient portions and your taste impressions, that can help you recreate your favourite variations.
Achieving the right texture in keto chocolate mousse hinges on careful ingredient selection and execution. The key lies in balancing the richness of the chocolate with the lightness of the air incorporated throughout whipping.
Flavor Enhancement and Variations:
Infusing the Cream: Instead of using plain heavy cream, infuse it with vanilla bean, cinnamon stick, or even a hint of chili powder for a novel twist. Steep the flavoring brokers in the cream for no much less than half-hour earlier than chilling and whipping. This adds a delicate complexity to the general taste profile.
Premium Chocolate: Opt for high-quality darkish chocolate (70% cacao or higher) with distinct flavor notes. Different chocolates supply varying degrees of bitterness and sweetness, influencing the final style of the mousse. Experiment with single-origin goodies for a nuanced taste expertise.
Coffee or Espresso: A tablespoon of strong brewed coffee or espresso added to the chocolate mixture can deepen the flavour and add a delicate bitterness that complements the sweetness. This is especially well-suited for darker chocolates.
Liqueurs: A touch of keto-friendly liqueur like unsweetened almond extract or a sugar-free chocolate liqueur (check labels carefully) adds sophistication and a delightful aroma. Use sparingly, as these can overpower the chocolate flavor if utilized in extra.
Spices: A pinch of sea salt enhances the chocolate taste, while a touch of cayenne pepper provides a stunning heat. Experiment with other spices like cardamom or nutmeg for extra adventurous profiles. Remember to start with a small quantity and regulate to your style.
Adding Keto-Friendly Toppings:
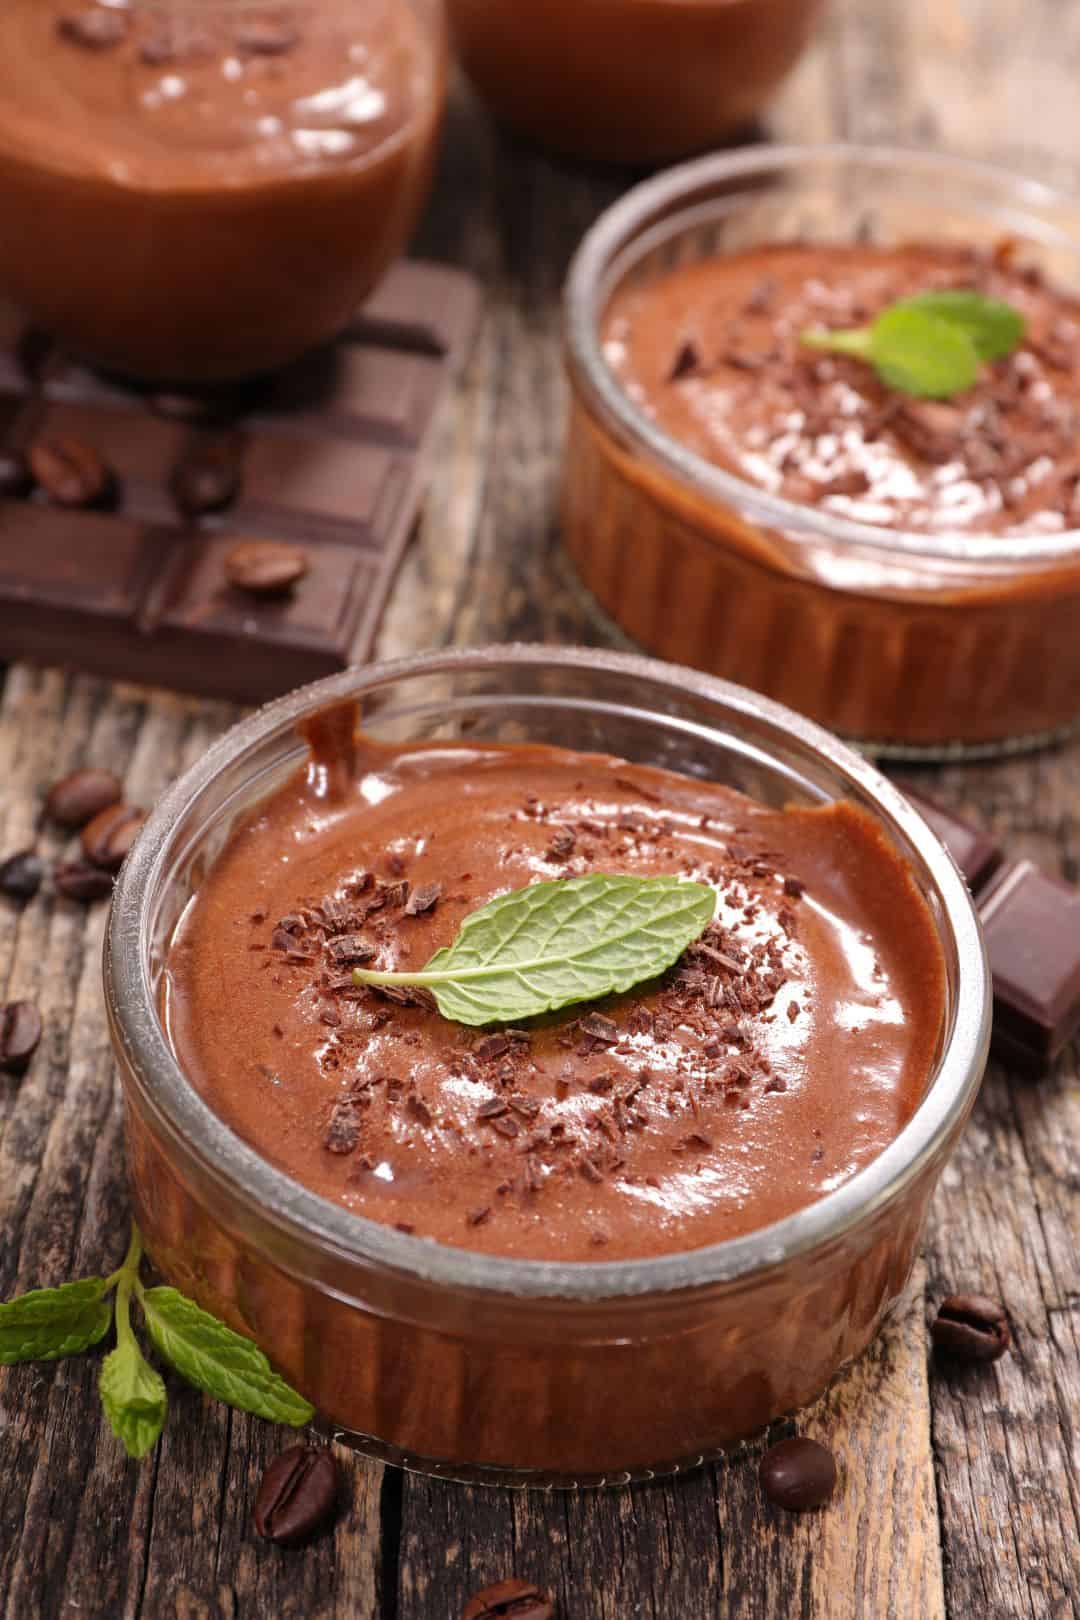
Sugar-Free Chocolate Shavings: Garnish with finely shaved dark chocolate for a sublime and decadent touch. Ensure the chocolate is sugar-free and keto-compliant.
Keto-Friendly Whipped Cream: A dollop of freshly whipped heavy cream adds a contrasting texture and extra richness. Sweeten it subtly with a keto-friendly sweetener if desired.
Nuts and Seeds: Toasted nuts like pecans, almonds, or macadamia nuts, or seeds like chia or flax seeds, add a satisfying crunch and healthy fat. Use sparingly to take care of the mousse’s delicate texture.
Berry Coulis: A easy coulis created from unsweetened berries (strawberries, raspberries, blueberries) adds a vibrant color, tartness, and refreshing distinction to the wealthy chocolate mousse. Blend the berries with a contact of erythritol or one other keto-friendly sweetener if wanted.
Coconut Flakes: Toasted coconut flakes add a tropical contact and pleasant textural contrast. Choose unsweetened varieties.
Chocolate-Covered Keto-Friendly Candies: For a really indulgent touch, add a couple of items of sugar-free chocolate-covered nuts or different keto-friendly candies.
Remember to at all times verify the nutritional labels of all keto-friendly merchandise to ensure they meet your dietary wants. Experiment with different combos of flavors and toppings to create your good keto chocolate mousse masterpiece.
The secret to a very exceptional mousse lies not simply within the recipe, but also in the consideration to detail throughout preparation. Gentle folding, proper chilling, and suave presentation all contribute to the final experience.
While the immediate focuses on texture, reaching the proper keto chocolate mousse hinges significantly on taste enhancement and variations to create a delightful and satisfying expertise past just a easy, creamy mouthfeel.
Balancing Sweetness and Bitterness: The absence of traditional sugars necessitates careful consideration of sweeteners. Erythritol, monk fruit, and stevia each have distinctive sweetness profiles and aftertastes. Experimenting with combos or supplementing with a touch of cocoa powder (for its bitterness) can create a more nuanced and fewer intensely sweet flavor.
Enhancing Chocolate Depth: Using high-quality darkish chocolate (70% cacao or higher) is crucial. The greater cacao share provides a richer, extra advanced chocolate flavor that reduces reliance on excessive sweeteners. Consider different varieties of dark chocolate – some have fruity notes, others are more bitter, or possess a nutty undertone – to discover various taste profiles.
Adding Aromatic Spices: A pinch of cinnamon, cardamom, or perhaps a dash of cayenne pepper can elevate the chocolate’s flavor complexity. Cinnamon provides warmth, cardamom provides a refined floral note, and cayenne brings an sudden kick, balancing the richness of the chocolate. Experiment sparingly to avoid overpowering the mousse.
Incorporating Extracts and Oils: Vanilla extract is a traditional, adding a familiar sweetness and depth. However, consider options like almond extract (for a nutty edge) or peppermint extract (for a refreshing twist, significantly in a minty chocolate variation). Avocado oil, whereas flavorless, adds richness and creaminess, whereas coconut oil (in moderation) can subtly impart coconut taste. Choose primarily based on your desired taste profile.
Fruit Infusions: Pureed berries (raspberries, blackberries) or a contact of espresso powder can introduce complementary fruity or espresso notes. Be mindful of the acidity and sweetness levels of the fruit, adjusting the quantity of sweetener accordingly. A trace of orange zest can brighten the chocolate flavor.
Nutty Delights: Finely chopped nuts (almonds, pecans, hazelnuts) can add texture and a pleasant nutty flavor, creating a more decadent mousse. Nut butters (almond, cashew) can enhance creaminess and introduce delicate nuttiness, but pay consideration to the additional fat content material and potential for altering texture.
Salt’s Subtle Magic: A tiny pinch of sea salt enhances the chocolate’s sweetness and creates a more well-rounded taste profile. It’s a crucial component that always gets ignored.
Flavor Pairing Exploration: Think beyond the typical chocolate pairings. Consider savory notes similar to a hint of smoked sea salt or even a touch of chili powder for a singular twist. This adventurous approach may lead to surprisingly delicious results.
Layering Flavors: Don’t be afraid to experiment with layering flavors. For instance, create a base of darkish chocolate mousse, then prime it with a swirl of raspberry puree for a pleasant distinction. A sprinkle of cocoa powder or chopped nuts on prime offers a textural and visual attraction that provides to the overall sensory expertise.
- Tip 1: Always style and adjust seasonings all through the process. Flavors can evolve because the mousse chills.
- Tip 2: Start with small amounts of flavor additions; you’ll be able to always add extra, but you’ll have the ability to’t take it away.
- Tip three: Consider the overall stability: sweetness, bitterness, acidity, and saltiness ought to all work together harmoniously.
By meticulously managing sweetness, using high-quality ingredients, and creatively incorporating flavor enhancers, you’ll find a way to create a keto chocolate mousse that isn’t only texturally perfect but additionally a symphony of pleasant flavors.
Troubleshooting Common Issues
Achieving the right texture in keto chocolate mousse is a fragile stability, and typically, issues go awry. Overly liquid mousse is a typical frustration.
The culprit is usually an imbalance of components, primarily too much liquid or not sufficient fat.
Let’s troubleshoot this:
1. Incorrect Ratio of Cream to Liquids: The heavy cream types the base and structure of your mousse. If you’ve used too little, or an extreme amount of liquid (even a little further coffee or extract can make a difference), the result shall be runny. Double-check your recipe meticulously. Consider barely reducing the liquid elements next time.
2. Cream Temperature: Chilled heavy cream is crucial for correct whipping. If your cream was too warm, it wouldn’t whip to stiff peaks, leading to a thinner, less steady mousse. Always ensure your cream is completely chilled before you start.
3. Over-whipping or Under-whipping the Cream: Both extremes are problematic. Over-whipping can cause the cream to separate (butter and buttermilk!), resulting in a grainy texture and a much less voluminous mousse. Under-whipping results in a weak structure, contributing to the liquidity.
4. Quality of Heavy Cream: The fat content of your heavy cream instantly affects its whipping ability. Lower-fat cream is not going to whip as nicely, contributing to a much less stable mousse. Using high-quality, high-fat (at least 36%) heavy cream is essential.
5. Insufficient Chilling Time: Allowing the mousse to correctly chill in the fridge is crucial for setting. If you are impatient and serve it too quickly, it is going to be delicate and liquid.
6. Type of Sweetener: Certain sweeteners can have an result on the ultimate consistency. Some liquid sweeteners may add extra moisture. If you’re using a liquid sweetener, guarantee it’s thoroughly incorporated and measure precisely.
7. Incorrect Chocolate Type: Using chocolate chips that are too low in cocoa butter or overly processed may alter the end end result negatively. Opt for high-quality dark chocolate with the next cocoa butter content material for finest results.
8. Addition of Other Ingredients: Extra elements, corresponding to extracts or liqueurs, can enhance the liquid content material if added excessively. Use these sparingly and precisely as per the recipe.
Solutions for Overly Liquid Mousse:
• Chill Thoroughly: Place the mousse in the refrigerator for at least 2-3 hours, or even overnight. This will permit it to set properly.
• Add Thickener (Careful!): As a last resort, you would attempt to thicken the mousse by gently folding in a small quantity of unsweetened whipped coconut cream or a keto-friendly thickener (following the instructions on the packet). Be extremely cautious; too much will make the mousse too thick.
• Re-Whip: If the mousse hasn’t set absolutely, contemplate carefully re-whipping it (without over-whipping) to re-incorporate air. Be very cautious not to break the emulsion.
• Start Again: If your mousse is considerably too liquid and the above doesn’t work, it is higher to start out over with fresh ingredients. Measure exactly and follow the recipe diligently.
By rigorously considering each step and paying shut consideration to ingredient ratios, you possibly can avoid an excessively liquid keto chocolate mousse and achieve that good, dreamy texture.
Remember, follow makes perfect! Don’t be discouraged in case your first attempt is not flawless. Keep experimenting, and you’ll soon master the artwork of making scrumptious keto chocolate mousse.
Achieving a flawlessly smooth and decadent texture in keto chocolate mousse may be difficult, but mastering a few key methods will guarantee success each time.
Addressing Graininess: Graininess usually stems from improperly melted chocolate or inadequate emulsification of the fat.
Insufficiently Melted Chocolate: Ensure your chocolate is completely melted and easy earlier than incorporating it into the other ingredients. Use a double boiler or microwave briefly bursts, stirring incessantly, to prevent scorching. Lumps of unmelted chocolate will create a grainy ultimate product.
Poor Emulsification: The key to a clean mousse is a well-emulsified mixture. This means the fats (from the cream or butter) needs to be completely integrated with the liquid elements (e.g., sweetener, extracts). Use a whisk or immersion blender to completely combine every thing, breaking down any clumps and making a smooth, homogeneous mixture. Over-whipping also can incorporate an extreme quantity of air, leading to a less dense and doubtlessly grainy texture.
Using Low-Quality Chocolate: The quality of your chocolate considerably impacts the ultimate texture. Opt for high-quality darkish chocolate with a higher percentage of cocoa solids for a richer, smoother outcome. Cheap chocolate often incorporates more fillers that can contribute to graininess.
Incorrect Sweetener: Some keto sweeteners don’t dissolve fully and may go away a gritty texture. Experiment with totally different keto-friendly sweeteners (e.g., erythritol, monk fruit, stevia) to seek out one which blends seamlessly into your mousse without affecting texture.
Dealing with Lumpiness: Lumpiness often arises from improperly whipped cream or inadequate blending.
Over-Whipped Cream: Over-whipping heavy cream could cause it to turn into grainy or curdled. Whip the cream to gentle peaks solely, stopping just earlier than it turns into stiff. Incorporating over-whipped cream into the chocolate mixture will lead to a lumpy last product.
Insufficient Blending: Thoroughly mix all components to ensure a clean, consistent combination. An immersion blender is especially efficient for breaking down any clumps and creating an ethereal texture without over-whipping.
Adding Too Much Cold Ingredients: Introducing cold ingredients too shortly may cause the chocolate to grab, leading to a lumpy texture. Ensure all ingredients are at an analogous temperature earlier than combining.
Troubleshooting Strategies:
Straining the Mousse: If you discover small lumps after mixing, pressure the mousse by way of a fine-mesh sieve to remove any remaining imperfections. This approach is especially useful for removing any undissolved sweetener particles.
Re-Melting and Re-Blending: If your mousse is significantly lumpy, try gently re-melting the chocolate and re-blending the entire combination. Ensure every little thing is completely mixed at a consistent temperature.
Adding More Liquid: If the mousse is just too thick and lumpy, you’ll find a way to carefully add a small quantity of heavy cream or unsweetened almond milk to skinny it out. Add it gradually and continue mixing until the desired consistency is achieved.
Chilling Properly: Proper chilling is essential for setting the mousse and enhancing its texture. Chill for a minimal of 2-4 hours to allow the mousse to agency up earlier than serving. Over-chilling can typically make it barely more durable, however the texture ought to nonetheless be smooth.
By rigorously following these pointers and troubleshooting ideas, you’ll find a way to confidently create an expensive, perfectly smooth, and delectable keto chocolate mousse.
Achieving the perfect keto chocolate mousse hinges on understanding the fragile balance of components and method. A too-firm mousse often stems from several avoidable mistakes.
Over-whipped Cream: This is the most common offender. Over-whipping heavy cream transforms it from light and fluffy to dense and butter-like. The key is to cease whipping simply before stiff peaks type; purpose for gentle peaks instead. A hand mixer is preferable for larger management over the whipping process; you can really feel the texture as you go and cease instantly when it’s proper. If utilizing a stand mixer, start on low pace and thoroughly monitor the consistency.
Incorrect Cream Temperature: Very cold cream whips up extra quickly and may simply turn out to be over-whipped. Chilling the bowl and whisk is helpful, but let the cream come to only barely under room temperature (around 40-45°F) for optimum whipping. Too heat, and it won’t whip correctly in any respect.
Too Much Sweetener: While seemingly innocuous, certain keto sweeteners can have an result on the feel of the mousse. Some, especially those with a granular texture, can intrude with the emulsification process, leading to a firmer end result. If using erythritol or different powdered sweeteners, ensure they’re very finely ground and absolutely incorporated into the chocolate combination before folding in the whipped cream.
Insufficient Fat Content: The richness and creaminess of the mousse are instantly tied to the fats content of the heavy cream. Using lower-fat cream will produce a thinner and doubtlessly less stable mousse. Ensuring you use heavy cream with a minimal of 36% fat content material is crucial. Consider even using full-fat coconut cream for an extra boost of richness and stability.
Incorrect Folding Technique: Gentleness is paramount when folding the whipped cream into the chocolate mixture. Vigorous mixing will deflate the whipped cream, leading to a denser, much less ethereal mousse. Use a spatula and make folding motions from the underside up, rotating the bowl as you go. Incorporate the cream in a quantity of additions to ensure even distribution.
Type of Chocolate: Different forms of chocolate have varying fats contents. Using a high-quality dark chocolate with the next cocoa butter content helps to create a richer, creamier texture. Conversely, lower-quality chocolate can result in a less clean mousse, and probably a firmer result due to inconsistent fat distribution.
Adding Too Much Other Ingredients: Any additional components like cocoa powder, extracts, or maybe a keto-friendly espresso liqueur should be added cautiously and integrated properly. Adding too much can shift the stability of the mousse combination, doubtlessly making it heavier and firmer. Start with small quantities and add extra to taste, ensuring thorough mixing at each step.
Remedying a Too-Firm Mousse: If your mousse has already become too agency, there are some issues you’ll have the ability to attempt. Gently fold in a small quantity of extra heavy cream, a teaspoon at a time, to lighten the feel. Another option is to fastidiously microwave the mousse in short bursts (10-15 seconds at a time) until it reaches your required consistency. Remember to stir nicely after every interval to make sure even heating and forestall scorching.
Preventing Future Firmness Issues: To obtain consistent results, weigh your components for precision. Using a kitchen scale ensures the right proportions are used each time, stopping inconsistencies that can lead to a firmer than intended mousse. Pay shut consideration to the instructions and do not be afraid to experiment with adjusting the quantity of whipped cream slightly, as it could possibly tremendously affect the final texture.
By understanding these potential pitfalls and applying the suggested treatments, you’ll be well in your way to crafting a luscious, airy, and completely textured keto chocolate mousse that may delight your style buds.
Tips for Success
Success in keto chocolate mousse, like several baking endeavor, hinges on precision. Accurate measurements are paramount for attaining that velvety clean, melt-in-your-mouth texture.
Start with a calibrated kitchen scale. Forget relying solely on measuring cups; a scale supplies essentially the most accurate readings, especially for elements like powdered sweetener and cocoa powder, which may pack differently.
Zero out your scale after inserting your bowl or container on it. This ensures you’re only measuring the load of the ingredient itself.
When measuring liquids, use a liquid measuring cup placed on a flat surface. Bend down to eye degree to ensure accurate reading at the meniscus (the curve on the liquid’s surface).
For ingredients like heavy cream, which contributes considerably to the mousse’s texture, measure carefully to keep away from a end result that’s too thin or too thick.
Gentle handling is vital. Avoid vigorously whipping or mixing the ingredients; this can incorporate too much air, leading to a less luxurious texture. Aim for clean, even incorporation.
Use a fine-mesh sieve to pressure your mousse after it’s mixed. This removes any lumps, guaranteeing a seamless, cloud-like consistency.
Pay shut consideration to the kind of sweetener used. Erythritol, for example, can behave in another way from other keto-friendly sweeteners, impacting the ultimate texture. Consult your recipe carefully.
Consider using room temperature ingredients. This is very true for the heavy cream and eggs, as cold components can be more durable to whip into the right consistency. Room temperature elements lead to a smoother emulsion.
Chill the mousse properly. Allow ample time for the mousse to set in the refrigerator. The chilly temperature helps solidify the combination and enhances its rich texture.
Use high-quality ingredients. The quality of your cocoa powder and heavy cream directly impacts the richness and flavor of your mousse. Splurge a bit on premium ingredients for the most effective outcomes.
Don’t over-whip. Over-whipping can cause the mousse to turn into grainy or separate. Stop whipping as quickly as the specified consistency is reached.
If your mousse is too thick, fastidiously whisk in a tiny quantity of heavy cream or unsweetened almond milk to loosen the consistency.
If your mousse is too skinny, consider chilling it longer or gently folding in more whipped cream until you attain the desired texture.
Experiment with different manufacturers of keto sweeteners. Some sweeteners could incorporate higher than others into the mousse. Keep a report of your outcomes for future reference.
Practice makes perfect! Don’t be discouraged in case your first attempt isn’t perfect. Each batch will educate you more in regards to the nuances of attaining the ideal keto chocolate mousse texture.
Read reviews. Other keto bakers’ experiences and ideas can provide invaluable perception into achieving that excellent consistency.
Lastly, keep in mind to enjoy the process! Making keto chocolate mousse is a rewarding experience. Savor the accomplishment of a creamy, decadent treat that fits your dietary wants.
Using high-quality elements is paramount for reaching a luxuriously clean and decadent keto chocolate mousse. The richness and delicate nuances of the chocolate are amplified when paired with superior fat and sweeteners.
Start with the highest quality dark chocolate you can find. Look for chocolate with a excessive proportion of cocoa (70% or higher) and minimal added sugars. The larger the share, typically, the more intense the chocolate flavor and the less likely it’s to want extra sweetness.
Choose a great high quality unsweetened cocoa powder if you’re supplementing or substituting chocolate. Dutch-processed cocoa powder has a less acidic, smoother flavor than pure cocoa powder, which can be helpful for avoiding a barely bitter taste in your mousse.
The fats element significantly influences the texture. Heavy cream is important; its excessive fat content contributes to the airy, mild texture that defines a perfect mousse. Avoid using ultra-pasteurized cream; its higher processing can have an effect on its capacity to whip properly.
Opt for full-fat coconut milk for a creamier, richer mousse with a delicate coconut flavor. The fat content of full-fat coconut milk enhances the mousse’s stability and richness.
Erythritol or monk fruit sweetener is preferable for their neutral style and minimal impact on texture. While stevia can work, it may possibly depart a barely bitter aftertaste in some preparations. Experiment with small amounts to find your most popular sweetness degree without compromising texture.
Fresh, high-quality eggs are essential. Their yolks comprise a major quantity of fats and emulsify with the opposite components to create a smooth, steady mousse. Older eggs may not whip correctly. Use room-temperature eggs for optimum emulsification.
Vanilla extract, whether pure vanilla extract or vanilla bean paste, adds a pleasant complexity and aroma to your mousse. Avoid imitation vanilla flavorings, which can contain artificial components affecting the ultimate style and texture.
Precise measurements are important in baking and particularly in mousse. Over-whipping the cream or over-mixing the mousse can result in a grainy or separated texture. Under-whipping may end up in a much less airy final product.
Pay close attention to the temperature of your components. Cold cream whips better, while using slightly warmed chocolate helps to melt it smoothly and evenly with out lumps. Gently folding within the components prevents overmixing.
Taste as you go, adjusting the sweetness and cocoa focus to achieve your perfect flavor profile. Remember that the flavors will meld collectively as the mousse chills, so enable time for them to develop.
Proper chilling is essential for setting the mousse. A minimum of 2-3 hours within the fridge will allow the mousse to set perfectly and solidify. Avoid storing the mousse for extended intervals in warm temperatures, which could result in a separated or runny texture.
- Ingredient Quality Checklist:
- High percentage darkish chocolate (70% cacao or higher)
- High-quality unsweetened cocoa powder (Dutch-processed preferred)
- Heavy cream (not ultra-pasteurized)
- Full-fat coconut milk
- Erythritol or monk fruit sweetener
- Fresh, room-temperature eggs
- Pure vanilla extract or vanilla bean paste
Begin with meticulously measured elements. Keto baking demands precision; even slight variations can impact texture.
Use a kitchen scale for accuracy. Volume measurements are unreliable for reaching the proper consistency in keto desserts.
Choose high-quality, unsweetened cocoa powder. The richer the cocoa, the extra intense the chocolate taste and the smoother the mousse.
Employ full-fat coconut milk. Its richness contributes significantly to the creaminess and prevents a gritty texture.
Ensure the coconut milk is well-chilled earlier than whipping. Cold fats whips higher and creates a secure emulsion.
Whip the coconut cream gently at first, gradually growing the speed. Over-whipping can lead to a grainy or separated mousse.
Incorporate the cocoa powder gradually, making certain it is fully included earlier than including more to stop lumps.
Sweetener choice issues. Erythritol or monk fruit mix usually yield one of the best results for a clean, non-grainy texture.
Use a high-quality blender or food processor if incorporating further components like peanut butter or nut butter for a richer texture.
Fold in any additions gently utilizing a spatula. Avoid vigorous mixing to retain the air included during whipping.
Chill the mousse thoroughly. This allows the flavors to meld and creates a firmer, extra luxurious texture.
Patience is essential. Allow adequate chilling time for the mousse to set correctly; speeding this step compromises the final product.
Experiment with completely different ratios of ingredients. Adjustments may be wanted based on the particular brand of coconut milk or sweetener used.
Taste and regulate sweetness as wanted. Remember that chilling can subtly alter the perceived sweetness.
Don’t be discouraged by preliminary imperfections. Keto baking typically requires follow to grasp the intricacies of ingredient interactions.
Keep meticulous notes. Record ingredient portions, manufacturers, and any adjustments made to replicate your successes.
Embrace the educational process. Each attempt offers priceless expertise that refines your method and improves your results.
Consider utilizing a stand mixer with a whisk attachment for optimal whipping consistency and lowered effort.
Use room-temperature eggs (if your recipe consists of them), to ensure proper emulsification.
If incorporating alcohol (like a keto-friendly liqueur), add it at the end to keep away from affecting the whipping process.
Avoid over-mixing as quickly as the mousse is absolutely assembled, to preserve its delicate, ethereal texture.
Serve immediately for a softer mousse or chill longer for a firmer consistency. Preferences could differ.
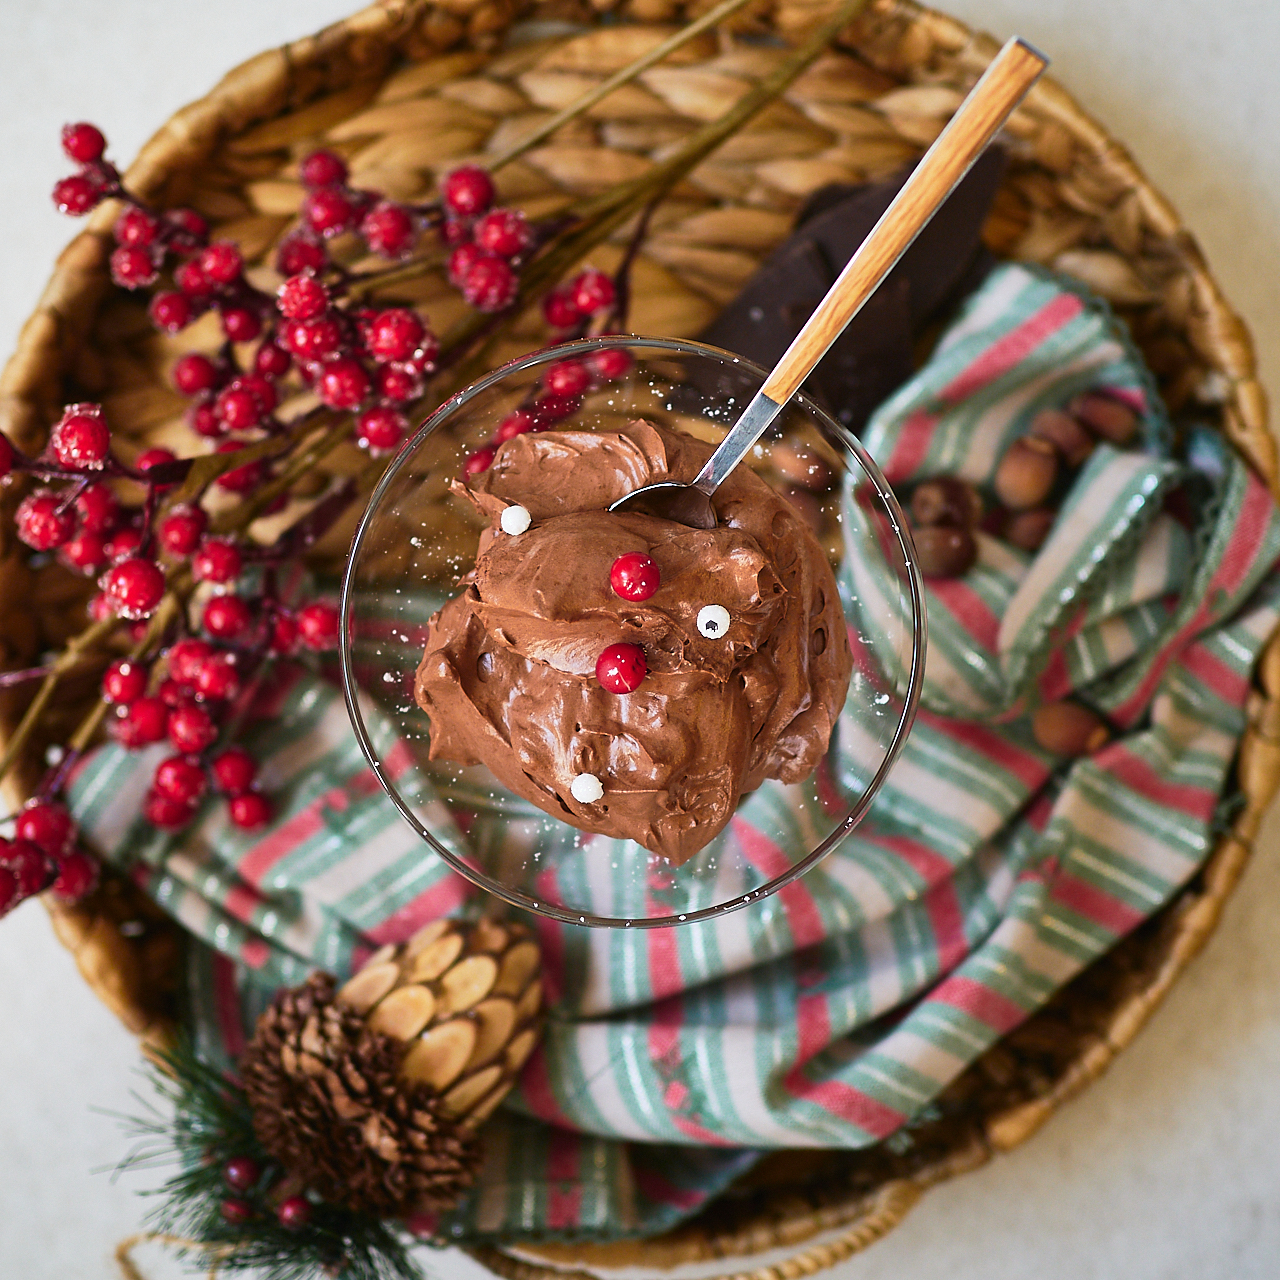
Present your mousse beautifully. A garnish of recent berries, chocolate shavings, or whipped coconut cream enhances the general presentation.
Enjoy the fruits of your labor! The excellent keto chocolate mousse is a reward for persistence and precision.